Need to use your desktop computer but don’t have a monitor?
Whether your monitor suddenly stopped working, you’re troubleshooting a PC that won’t boot properly, or you simply want to use your laptop as a temporary display, there’s an easy solution.
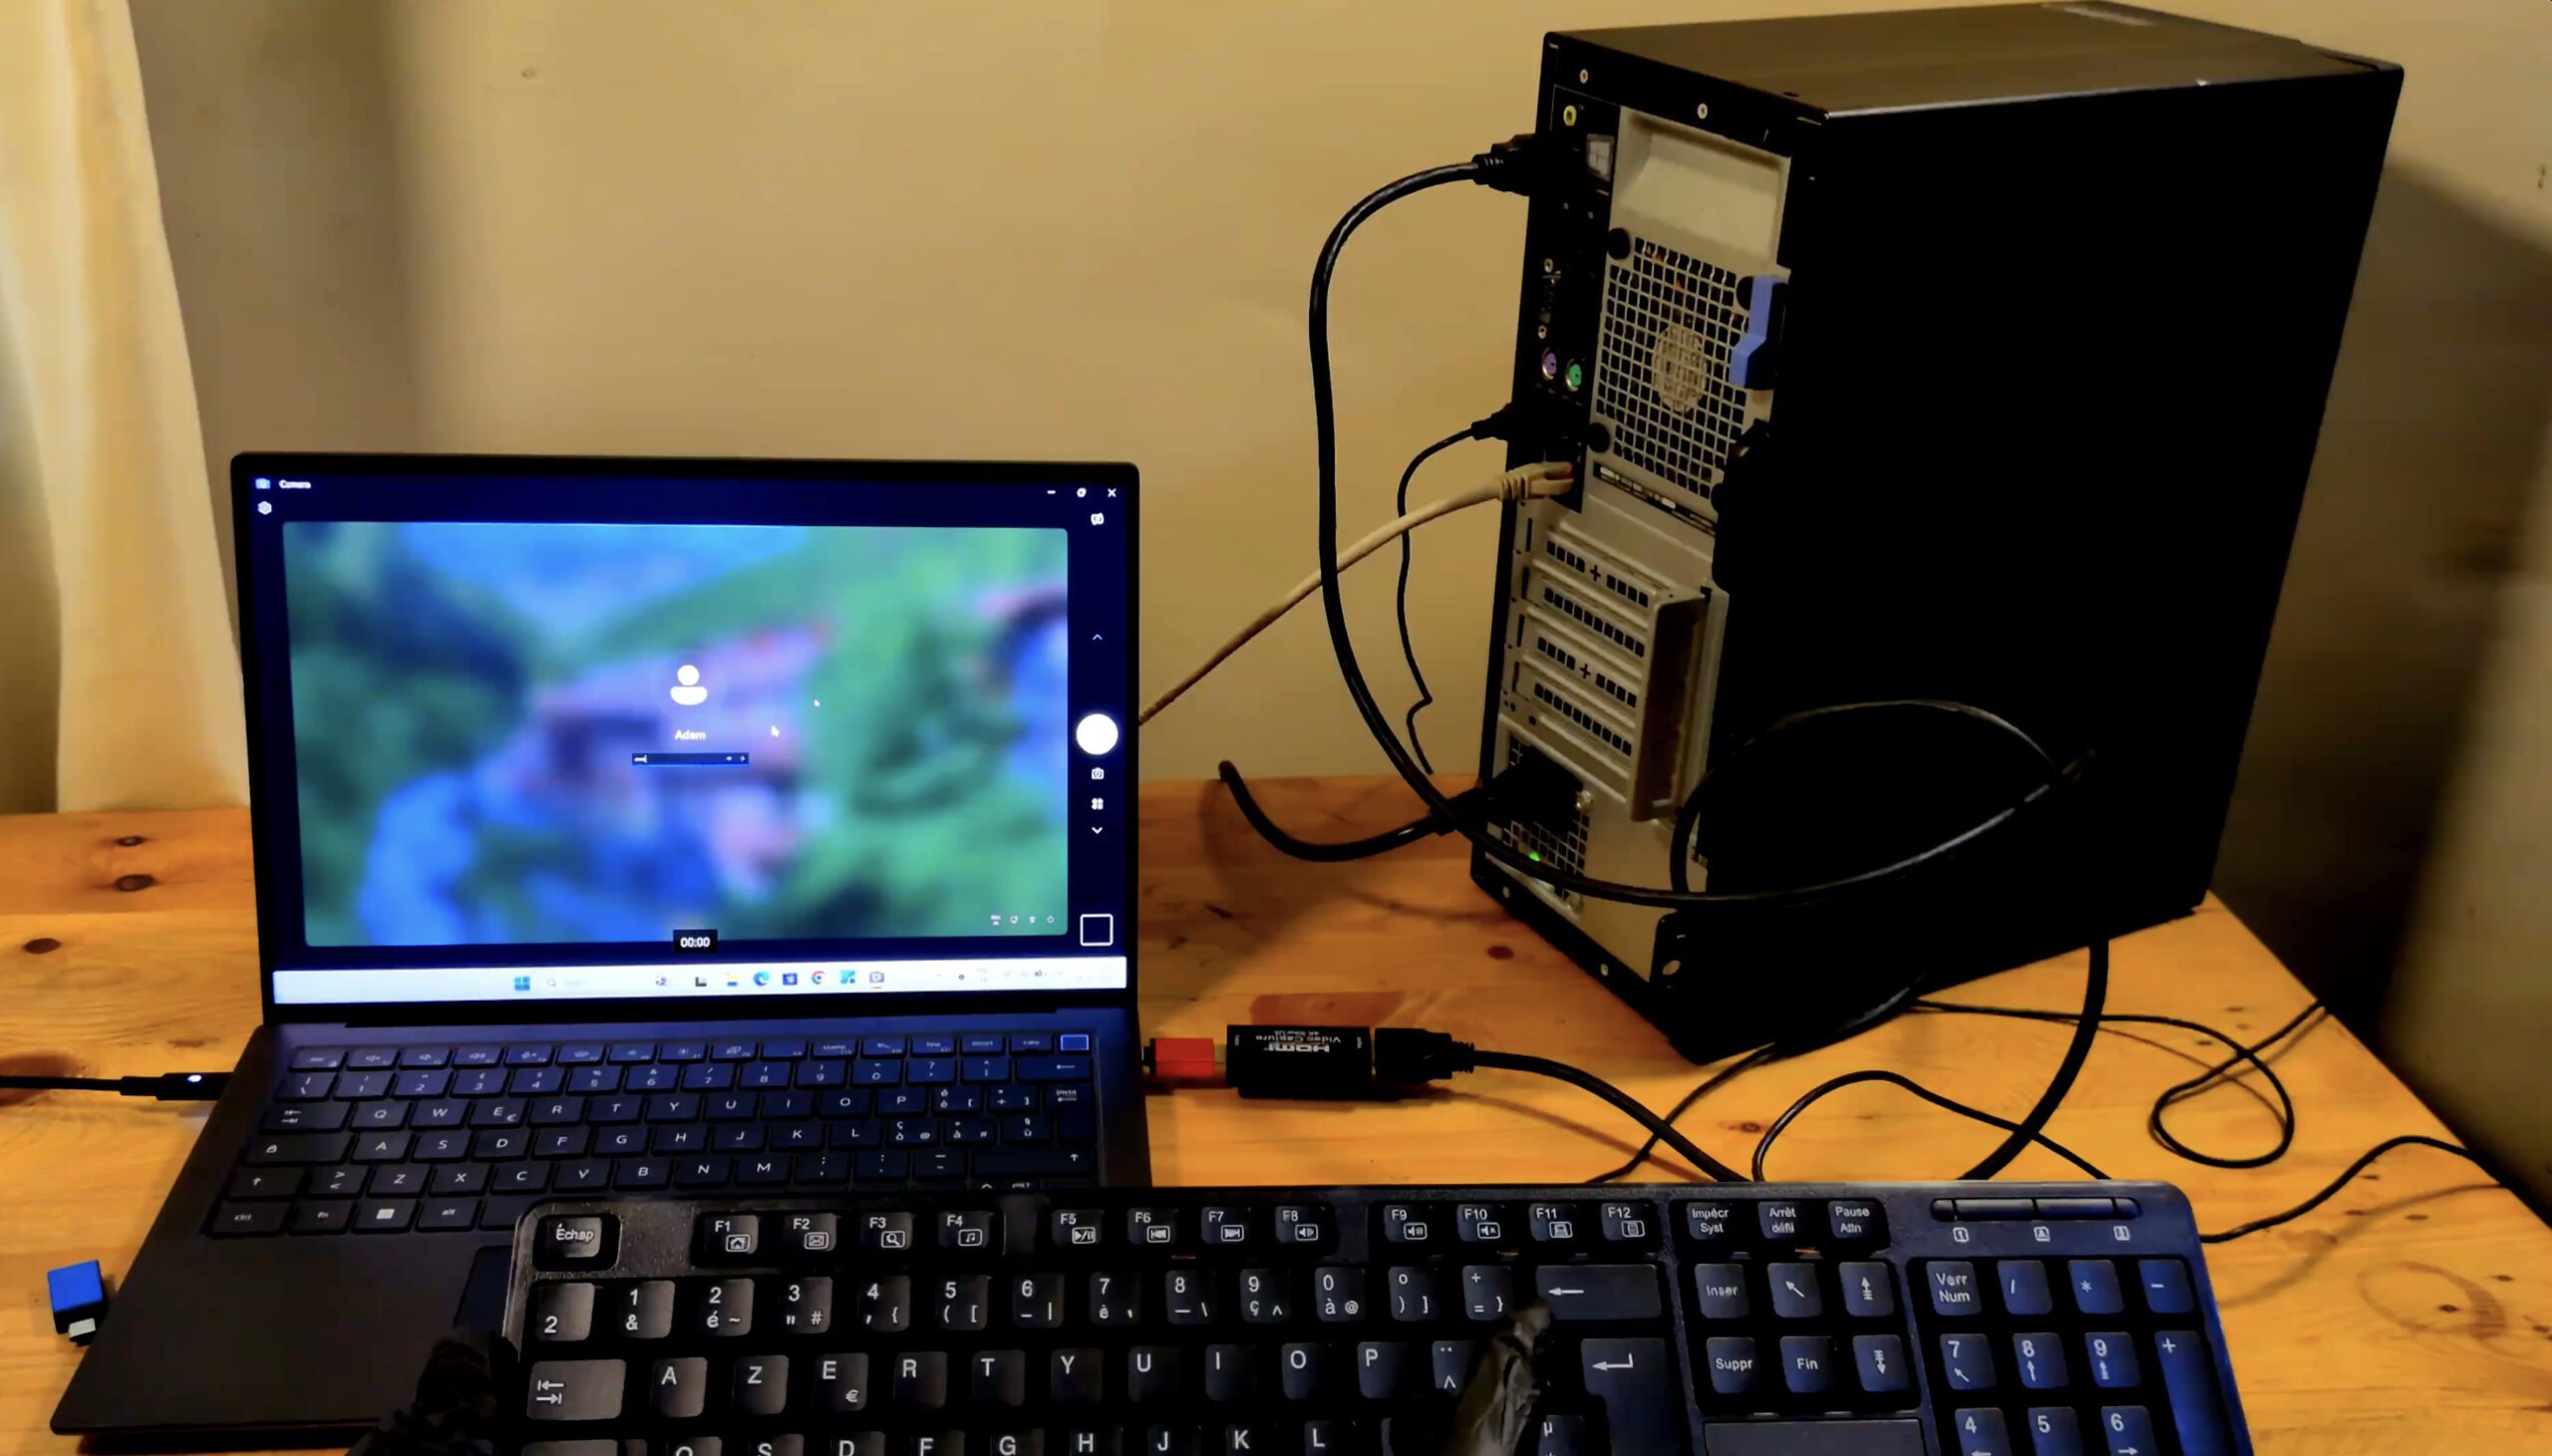
With an inexpensive HDMI-to-USB capture card, you can use your laptop as a monitor for virtually any desktop PC. This setup even allows you to view the BIOS, install Windows, and troubleshoot startup problems without connecting a traditional monitor.
In this guide, you’ll learn how the setup works and how to display your desktop PC on your laptop using the built-in Windows Camera app, VLC Media Player, or OBS Studio.
Can You Connect a Laptop to a Desktop with an HDMI Cable?
The short answer is no.
Many people assume they can simply connect an HDMI cable between a laptop and a desktop computer.
Unfortunately, that doesn’t work.
The HDMI port on almost every laptop is an HDMI output, not an input.
It’s designed to send video from the laptop to an external monitor or TV, not receive video from another computer.
Because of this hardware limitation, Windows cannot display another PC simply by connecting an HDMI cable.
The Solution: Use an HDMI Capture Card
Instead of connecting the computers directly, you’ll need an HDMI-to-USB video capture card.
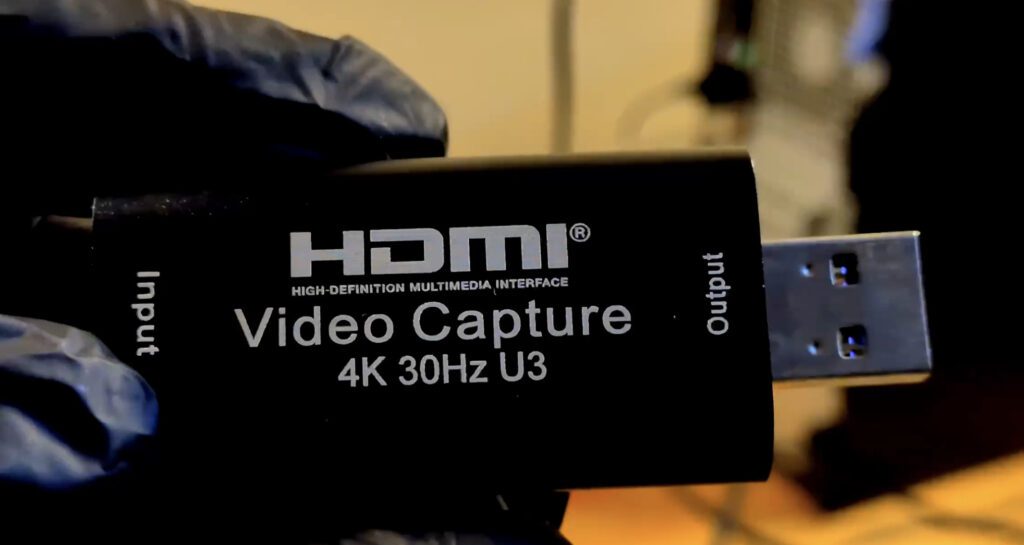
A capture card acts as an intermediary between the two devices.
It works like this:
Desktop PC
      │
      │ HDMI
      ▼
HDMI Capture Card
      │
      │ USB
      ▼
Laptop
The desktop sends its video signal through HDMI.
The capture card converts that HDMI signal into a USB video stream.
Windows then detects the capture card as a standard USB camera, allowing you to display the desktop’s video on your laptop.
The good news is that these devices are inexpensive. Most basic HDMI capture cards cost less than $20 and work with Windows 10 and Windows 11 without requiring additional drivers.
What You’ll Need
Before getting started, you’ll need:
- A desktop PC
- A laptop
- An HDMI cable
- An HDMI-to-USB capture card
- A free USB port on the laptop
If your laptop only has USB-C ports, you’ll also need one of the following:
- USB-C to USB-A adapter
- USB-C multiport hub
How to Connect Everything
Connecting the hardware only takes a minute.
- Connect the HDMI cable to the HDMI output on your desktop PC.
- Connect the other end of the HDMI cable to the HDMI input on the capture card.
- Plug the capture card into a USB port on your laptop.
If your laptop doesn’t have a standard USB-A port, connect the capture card using a USB-C adapter or docking station.
Once connected, Windows should automatically detect the device.
Verify That Windows Detects the Capture Card
Before opening any software, confirm that Windows recognizes the capture card.
- Right-click the Start button.
- Open Device Manager.
- Expand Cameras.
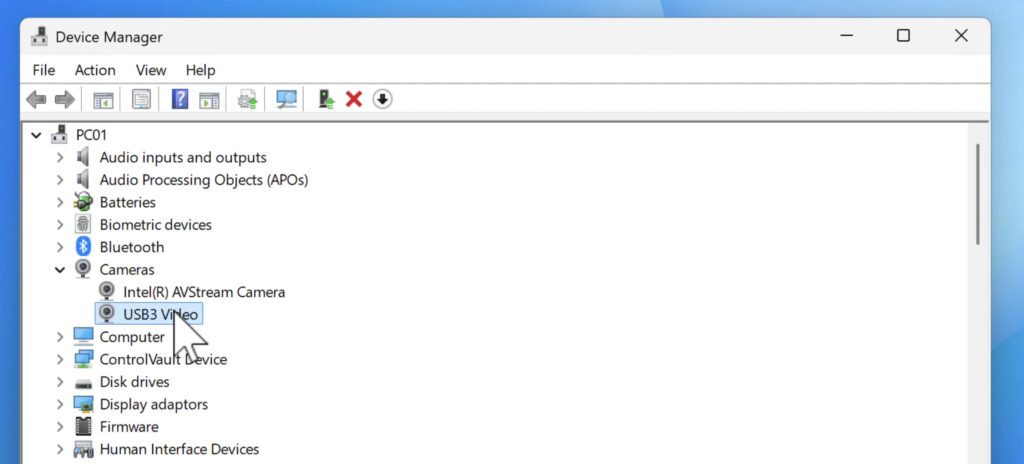
You should see something similar to:
- USB Video Device
- USB Camera
- Your capture card’s model name
Windows treats capture cards as USB cameras because they continuously stream video over USB.
If the device appears here, you’re ready to continue.
Method 1: Use the Windows Camera App
The easiest solution requires no downloads.
Windows already includes the Camera application.
Step 1
Open the Camera app from the Start menu.
By default, it will display your laptop’s webcam.
Step 2
Click the Switch Camera button (the circular arrow icon).
Select your USB capture card.
The Camera app will immediately begin displaying your desktop PC.
You can now:
- Boot your desktop
- Watch Windows start
- Open applications
- Install Windows
- Enter the BIOS or UEFI firmware
As long as your mouse and keyboard remain connected to the desktop computer, you’ll have full control of it.
Limitation
The Camera app always displays its interface buttons over the video.
Unfortunately, it cannot provide a completely clean full-screen experience.
Method 2: Display the Desktop in VLC
If you want full-screen viewing with lower latency, VLC is a better option.
After installing VLC Media Player, configure it as follows.
Open: Media → Open Capture Device
Configure these settings:
| Setting | Value |
|---|---|
| Capture Mode | DirectShow |
| Video Device | Your USB Capture Card |
| Audio Device | USB Audio (if available) |
| Resolution | 1280×720 or 1920×1080 |
| Aspect Ratio | 16:9 |
| Frame Rate | 30 FPS |
Under Show More Options, set: Caching = 0
Reducing the cache minimizes display latency and makes the desktop feel much more responsive.
Click Play, then press F11 or choose View → Full Screen.
Compared to the Camera app, VLC offers a cleaner display with lower latency.
Method 3: Use OBS Studio (Recommended)
If image quality is your priority, OBS Studio delivers the best results.
Although OBS is primarily known as streaming software, it also works extremely well as a full-screen monitor.
Create a Video Capture Source
Click: Sources → + → Video Capture Device
Give it any name, for example: Desktop Feed
Click OK.
Select Your Capture Card
In the Properties window:
Device : USB Video Capture Device
Resolution : 1920×1080 or 1280×720
Click OK.
The desktop feed now appears inside OBS.
Display It Full Screen
Right-click the preview.
Choose: Transform → Fit to Screen
Then right-click again.
Select: Projector (Preview)
Choose your laptop display.
OBS now displays the desktop in full screen with no menus, buttons, or overlays.
This provides the closest experience to using a real monitor.
Can You Access the BIOS?
Yes.
Because the capture card receives the desktop’s HDMI output directly, it displays everything, including:
- BIOS/UEFI
- Windows installation
- Boot menu
- Recovery environment
- Safe Mode
- Windows startup
This makes capture cards especially useful when repairing computers.
Understanding the Limitations
Although this setup works very well, it’s important to understand one limitation:
Latency.
The video signal must pass through:
- HDMI
- Capture card
- USB
- Windows
- Viewing software
This introduces a small delay.
For most tasks, this isn’t a problem.
The setup works well for:
- Office applications
- Web browsing
- Windows troubleshooting
- Installing Windows
- BIOS configuration
- Remote repairs
However, it is not recommended for:
- Competitive gaming
- Fast-paced FPS games
- Rhythm games
- Any task requiring instant response
A dedicated monitor remains the better choice for gaming.
See also: Convert MBR to GPT Without Data Loss
Which Method Should You Choose?
| Method | Best For | Advantages | Limitations |
|---|---|---|---|
| Windows Camera | Quick setup | No installation required | Interface always visible |
| VLC Media Player | Low latency | Better responsiveness, full screen | Slightly lower image quality |
| OBS Studio | Best overall | Highest image quality, clean full screen | Larger installation |
For most users, OBS Studio offers the best experience, while VLC is ideal if minimizing latency is your main concern.
Final Thoughts
Using a laptop as a monitor isn’t as simple as connecting an HDMI cable, but with an inexpensive HDMI capture card, it’s surprisingly easy.
Whether you’re recovering a computer, installing Windows, accessing the BIOS, or temporarily replacing a broken monitor, this setup provides a practical and affordable solution.
Among the available methods, the Windows Camera app is the fastest to set up, VLC offers the lowest latency, and OBS Studio delivers the cleanest and highest-quality display.
With the right capture card, your laptop can become a reliable secondary monitor whenever you need one.
Pingback: How to Run macOS 26 Tahoe in VMware on Windows
Pingback: How to Create a Portable Windows 11 Drive with Rufus
Pingback: Use Your Phone or Tablet as a Second Monitor for Windows PC