
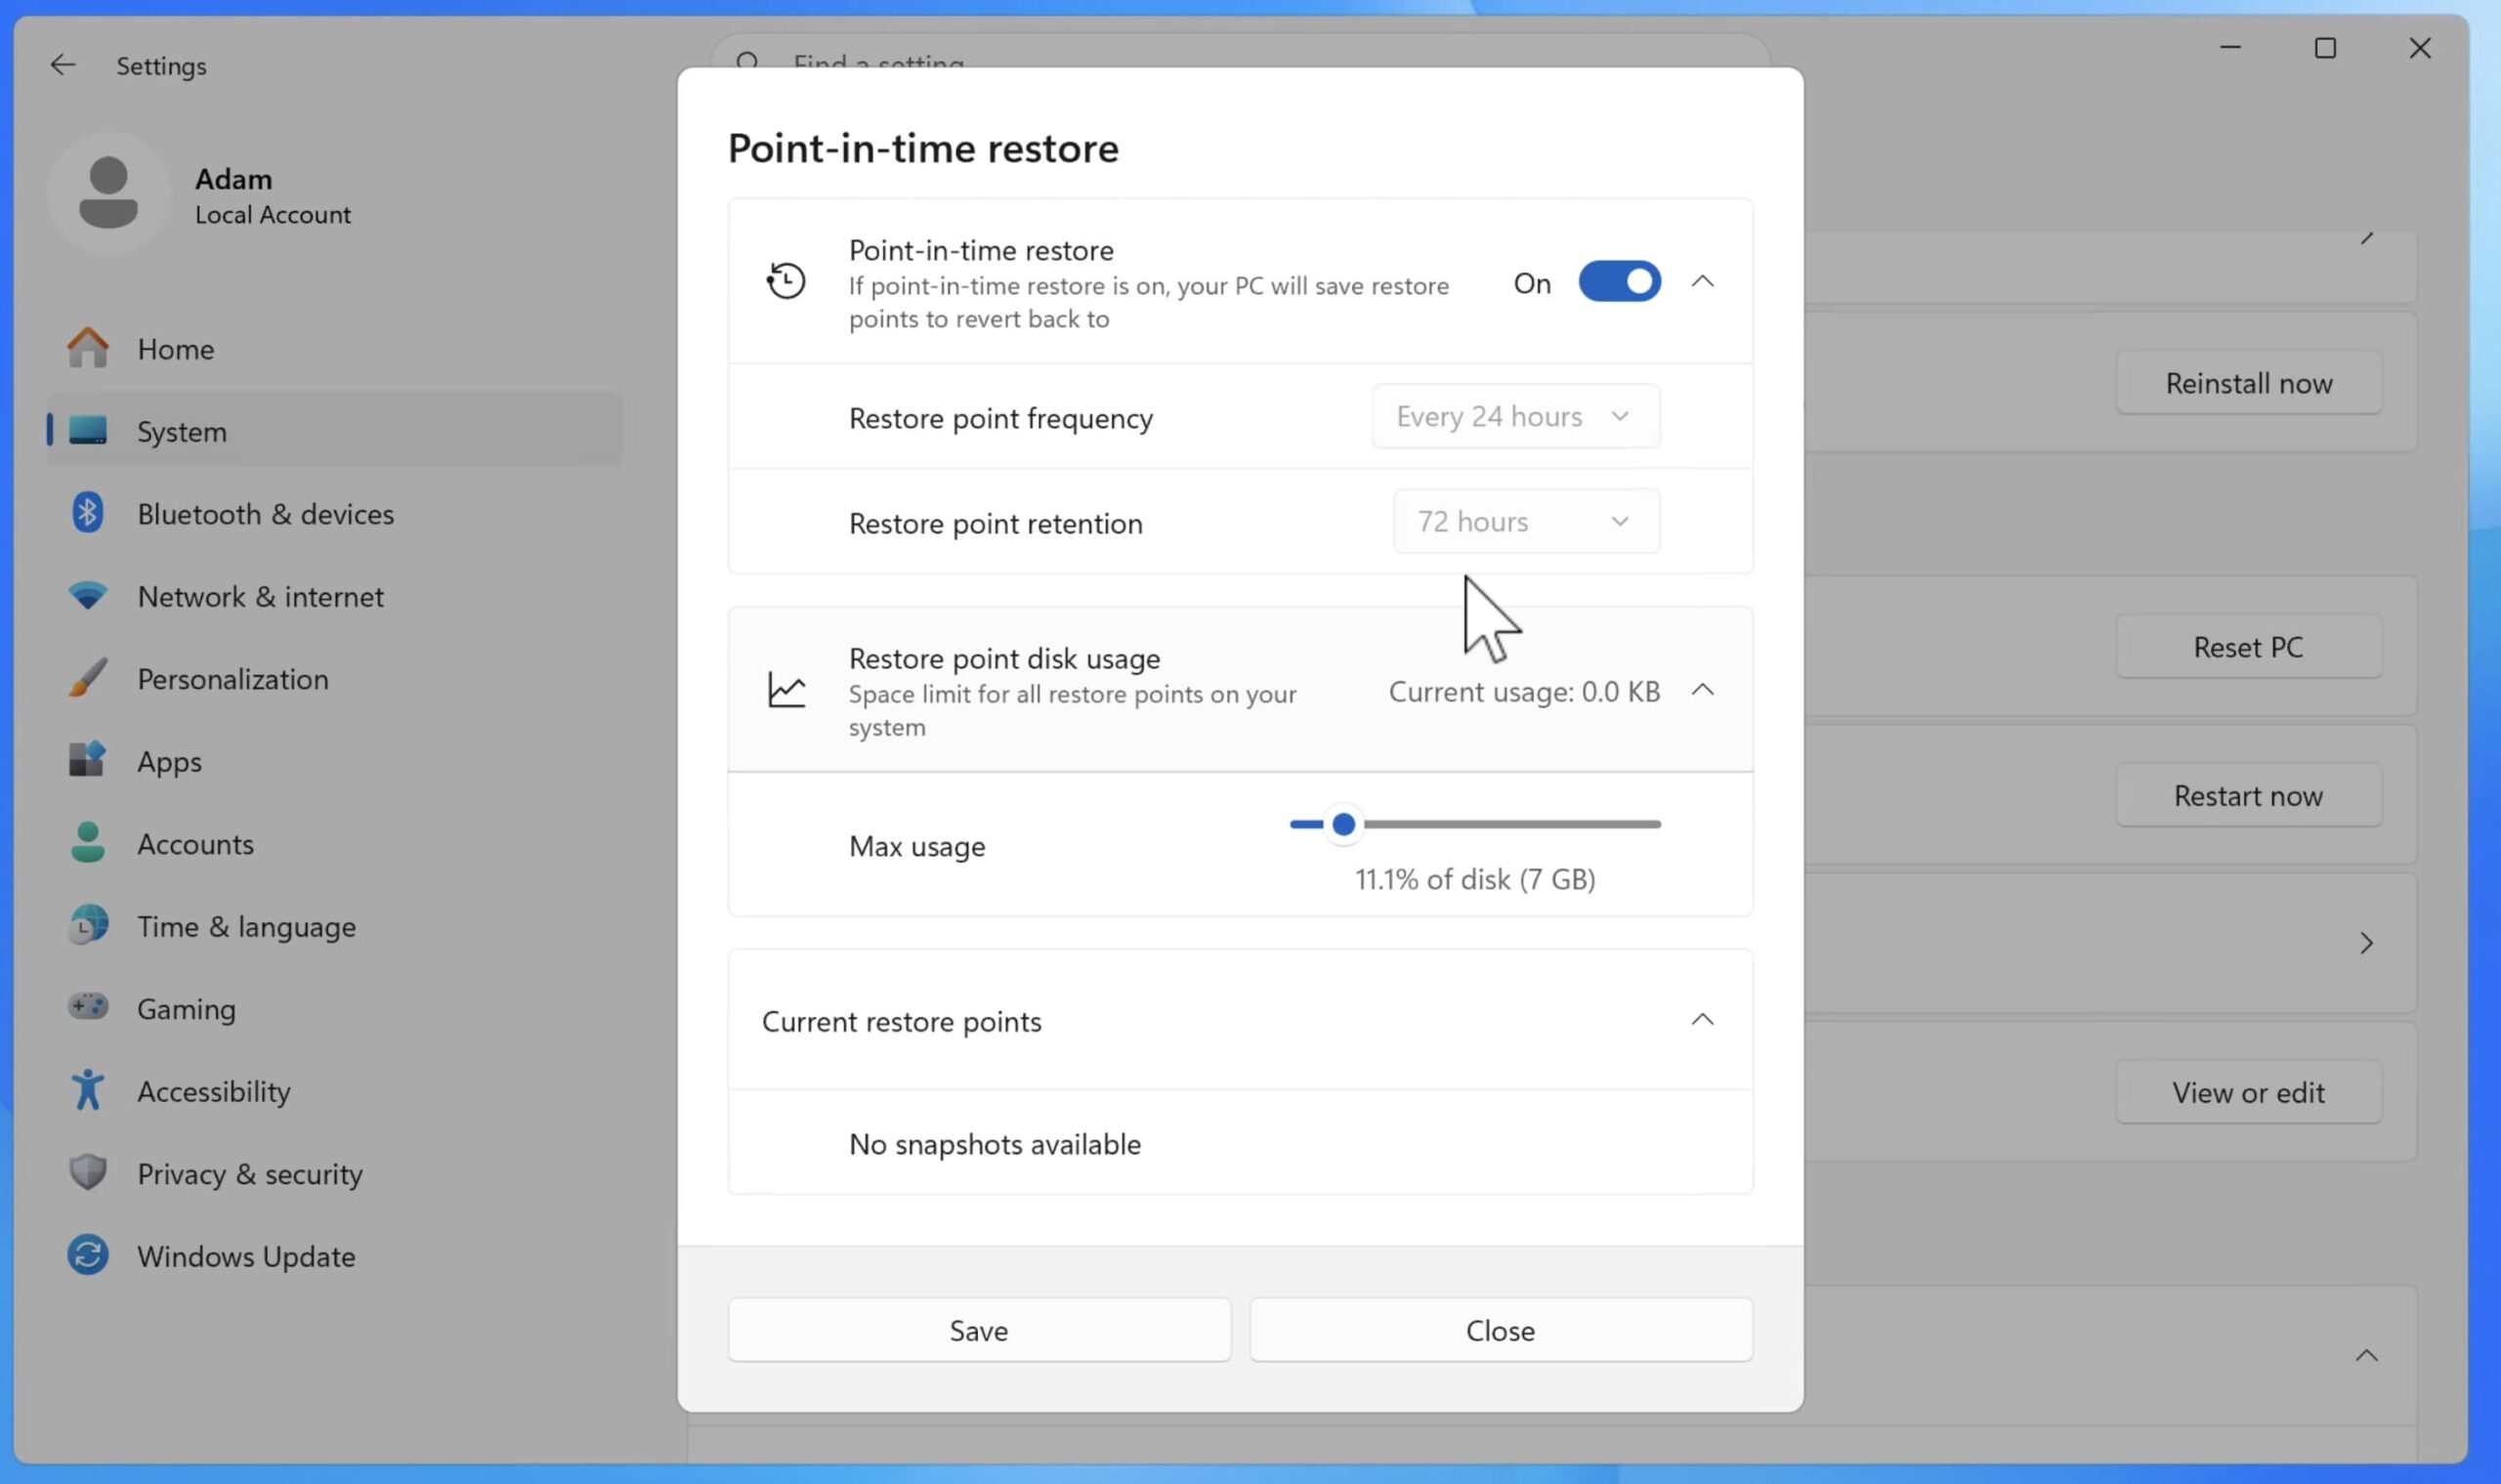
Microsoft has introduced one of the most significant improvements to Windows recovery in years. With the July 2026 update, Windows 11 now includes a new feature called Point-in-Time Restore, a more powerful evolution of the classic System Restore.
Instead of only restoring system files and settings, this new system creates a full snapshot of your PC, making it easier to recover from bad updates, broken drivers, or system crashes without wasting hours troubleshooting.
In this guide, you’ll learn what it does, how to configure it, and how to use it when something goes wrong, even if your PC refuses to boot.
What Is Point-in-Time Restore?
Point-in-Time Restore creates a snapshot of your system at a specific moment in time. Unlike the old System Restore, it doesn’t just track system files, it can include:
- System files and Windows settings
- Installed applications
- Personal files and user data
This makes recovery more complete, but also more important to understand.
When you restore your PC to an earlier point, everything created or changed after that snapshot may be lost, including files, apps, and settings.
Because of this, Point-in-Time Restore should never replace a proper backup system. Always keep your files backed up separately using cloud storage or an external drive.
Who Can Use This Feature?
On most Windows 11 Home and Pro devices, Point-in-Time Restore is enabled automatically after the July 2026 update.
It is generally active by default on systems with around 200GB or more storage. On smaller drives or managed corporate devices, you may need to enable it manually.
How to Find and Configure Point-in-Time Restore
To access the settings:
- Open Settings
- Go to System → Recovery
- Click Point-in-Time Restore
From here, you can manage several options:
- Enable or disable the feature
- Set how often restore points are created (from every 4 hours up to 24 hours)
- Adjust how long restore points are kept (default is 72 hours)
- Control storage usage (around 3% of disk space by default)
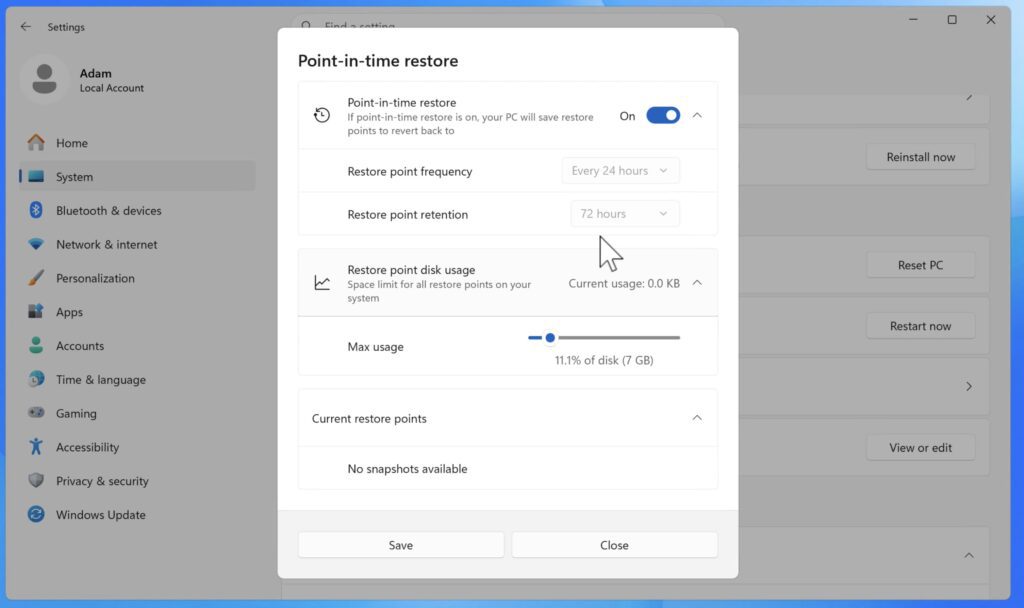
You may notice that some options are greyed out. This usually means Windows is managing the settings automatically based on your system configuration.
For most users, the default settings are already well-balanced and do not need adjustment.
Once enabled, Windows uses the Volume Shadow Copy Service to automatically create restore points in the background. You can also view a history of recent snapshots directly in the settings page.
How to Access Point-in-Time Restore
There are two ways to use this feature depending on your situation:
1. From the Desktop
If your PC is working normally, you can access recovery directly through Settings.
2. From Windows Recovery Environment (WinRE)
If your system won’t boot, you’ll need to access the Windows Recovery Environment instead. This can be done using a recovery USB drive or forced restart methods.
Important Tip: Disable BitLocker Before Restoring
If BitLocker or device encryption is enabled, you may be asked for a recovery key during the restore process.
To avoid interruptions:
- Go to Settings → Privacy & Security → Device Encryption
- Temporarily turn it off before starting the restore
- Wait for decryption to complete
- Re-enable it after recovery is finished
This simple step can prevent unnecessary recovery key prompts during restoration.
How to Perform a Restore from the Desktop
If your system is still accessible:
- Go to Settings → System → Recovery
- Under Advanced startup, click Restart now
- Your PC will boot into the recovery environment
- Select Troubleshoot → Point-in-Time Restore
- Choose a restore point from the list
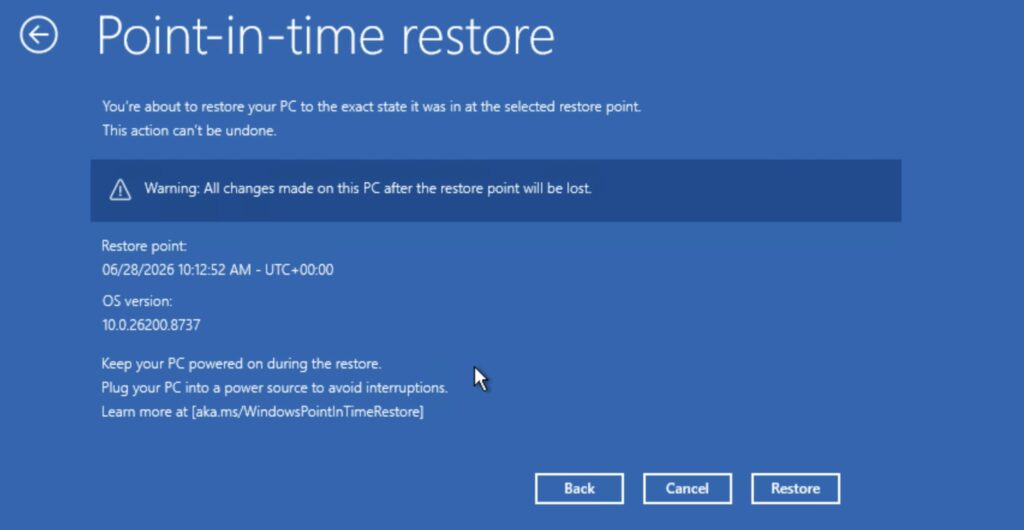
You’ll see a warning explaining what will be affected. This includes:
- Installed apps
- System settings
- Personal files created after the restore point
- Some credentials and certificates
Cloud-synced data (like OneDrive files) will remain safe as long as it was already synced before the restore point.
Confirm the operation and let Windows complete the process. The time required depends on your hardware and system state.
See also: How to Restore the Full Right-Click Menu in Windows 11
What to Do After the Restore
Once your PC restarts:
- Reinstall any apps installed after the restore point
- Recover missing files from your external or cloud backup
- Re-enable BitLocker if you turned it off
- Sign back into any affected applications
After these steps, your system should be back to a stable working state as it was at the chosen restore point.
If Your PC Won’t Boot
If Windows doesn’t start at all, you can still use Point-in-Time Restore:
- Boot into the Windows Recovery Environment
- Go to Troubleshoot → Point-in-Time Restore
- Select your restore point
- Confirm the restoration process
This method is especially useful after a failed update or bad driver that prevents Windows from starting normally.
How It Compares to the Old System Restore
The classic System Restore mainly focused on system files, registry changes, and application configurations. It usually avoided personal files.
Point-in-Time Restore goes further by capturing a more complete system snapshot, including personal data.
This makes it more powerful, but also means you must be more careful. A restore can now roll back personal files, not just system settings.
In short:
- Old System Restore = safer but limited
- Point-in-Time Restore = more powerful but broader impact
Final Thoughts
Point-in-Time Restore gives Windows 11 a much stronger recovery system than before. It can quickly fix broken systems caused by updates or drivers without requiring a full reinstall.
To use it effectively:
- Keep it enabled
- Leave default settings unless you have a specific need
- Always maintain an external backup of your files
With those basics in place, you gain a fast and reliable way to recover your system when things go wrong.



Pingback: How to Secure Windows 11 Without Third-Party Software