
Want to try macOS 26 Tahoe without buying a Mac?
Thanks to VMware Workstation and OpenCore for Virtual Machines (OC4VM), you can install and run the latest version of macOS directly on a Windows PC. Whether you’re a developer, IT professional, or simply curious about Apple’s newest operating system, a virtual machine lets you test macOS safely without modifying your existing Windows installation.
In this guide, you’ll learn how to download the official macOS recovery image, convert it into a VMware-compatible virtual disk, create the virtual machine, install macOS 26 Tahoe, and fix common issues such as graphics performance and missing audio.
What You’ll Need
Before you begin, make sure you have the following:
- VMware Workstation
- OC4VM (OpenCore for Virtual Machines)
- QEMU for Windows
- At least 8 GB of RAM (16 GB recommended)
- Around 80 GB of free disk space
- A stable internet connection
Step 1: Create a Folder for the Virtual Machine
Open File Explorer and create a folder where you’ll store all virtual machine files.
For example: macOS
Keeping everything in one location makes the installation much easier to manage.
Step 2: Download OC4VM
Download OpenCore for Virtual Machines (OC4VM) from GitHub.
This project provides a preconfigured OpenCore bootloader that allows macOS to boot correctly inside VMware.
Extract the ZIP archive into the folder you created earlier.
Step 3: Install QEMU
Next, download and install the latest QEMU for Windows (qemu-w64).
During installation, simply click Next until the installation completes.
QEMU will later convert Apple’s recovery image into VMware’s virtual disk format.
Step 4: Download the macOS 26 Tahoe Recovery Image
Open the extracted OC4VM folder and navigate to:
tools
└── windows
Run:
recoveryOS.exeA command window will appear.
When prompted, enter:
7to download macOS 26 Tahoe.
The tool downloads the official recovery image directly from Apple’s servers.
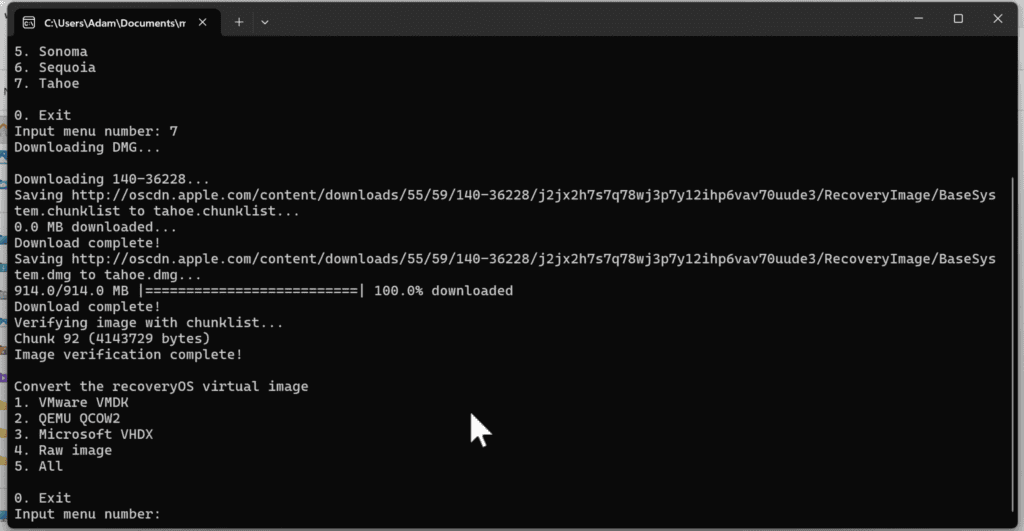
The download is approximately 750 MB to 1 GB, depending on the version.
Step 5: Convert the Recovery Image for VMware
Once the download finishes, the recovery image must be converted into VMware’s native virtual disk format.
In the same command window, choose:
1to begin the conversion.
If you need to convert it manually, open Command Prompt inside the folder containing the downloaded DMG file and run:
"C:\Program Files\qemu\qemu-img.exe" convert -O vmdk -o compat6 tahoe.dmg tahoe-install.vmdkReplace tahoe.dmg with the actual filename if necessary.
After a few minutes, you’ll have a new file named:
tahoe-install.vmdkThis is the virtual disk that VMware will use during installation.
Step 6: Copy the Virtual Disk
Open the OC4VM VMware folder.
You’ll see two folders:
vmware
├── intel
└── amd
Choose the one that matches your processor.
Copy:
tahoe-install.vmdkinto the appropriate folder.
Step 7: Open the Virtual Machine in VMware
Launch VMware Workstation.
Select: Open a Virtual Machine
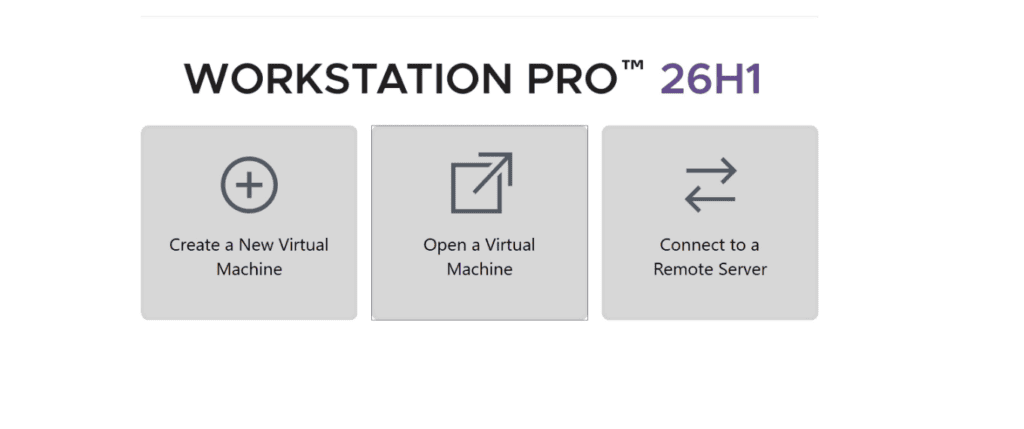
Browse to the OC4VM folder and open the preconfigured VMware virtual machine.
Before powering it on, edit the virtual hardware.
Recommended settings:
| Hardware | Recommended |
|---|---|
| Memory | 8 GB minimum (16 GB preferred) |
| CPU | 4 cores or more |
| Disk | Add the converted VMDK |
To attach the virtual disk:
VM Settings
→ Add
→ Hard Disk
→ SATA
→ Use Existing Virtual Disk
Select:
tahoe-install.vmdk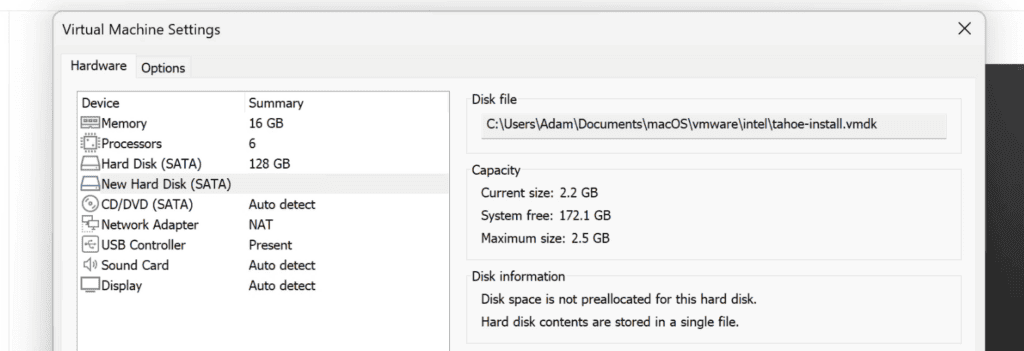
Click Finish, then OK.
Step 8: Install macOS 26 Tahoe
Power on the virtual machine.
OpenCore will appear.
Select: Reinstall macOS Tahoe
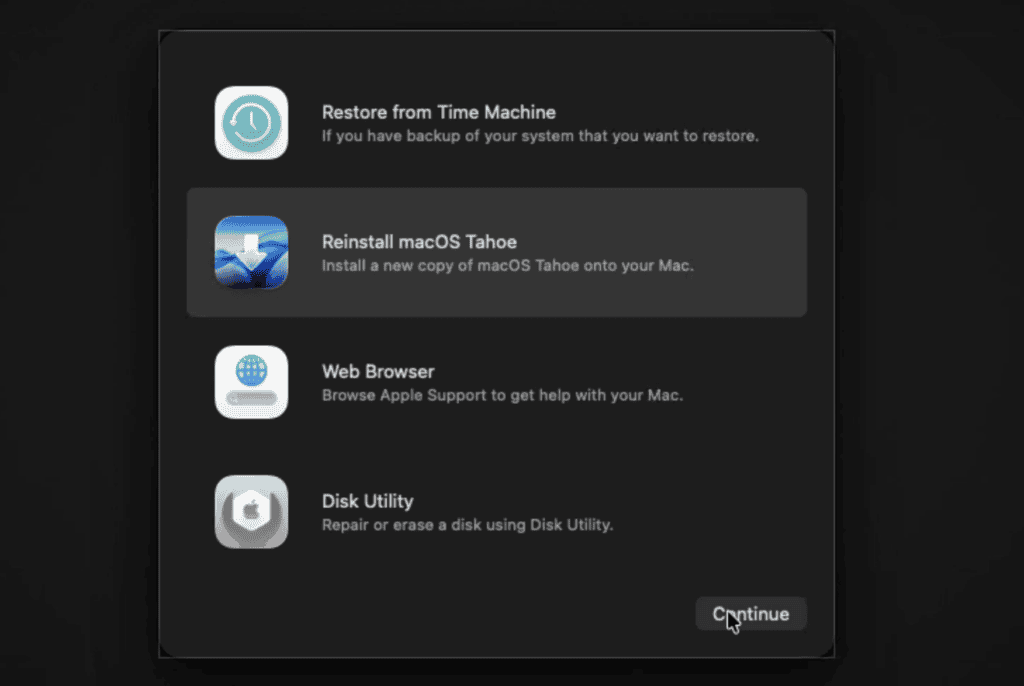
Choose your preferred language.
When the macOS Recovery environment loads:
- Open Disk Utility
- Select the virtual disk
- Erase it using:
- Format: APFS
- Scheme: GUID Partition Map
Close Disk Utility.
The installer downloads the complete operating system from Apple.
Depending on your internet speed, this may take anywhere from 20 minutes to over an hour.
The virtual machine will restart several times.
Allow each restart to complete without interruption.
Step 9: Complete macOS Setup
Once installation finishes, configure macOS normally.
Choose:
- Country
- Keyboard layout
- Network
- Apple ID (optional)
- User account
- Password
After setup completes, you’ll arrive at the macOS desktop.
Step 10: Install VMware Tools
Immediately after installation, macOS may feel slow and unresponsive.
This happens because the virtual machine is using only a basic graphics driver.
To improve performance:
Open:
OPENCORE
→ OC4VM
→ ISO
Double-click:
darwin.isoRun:
Install VMware ToolsFollow the installation wizard.
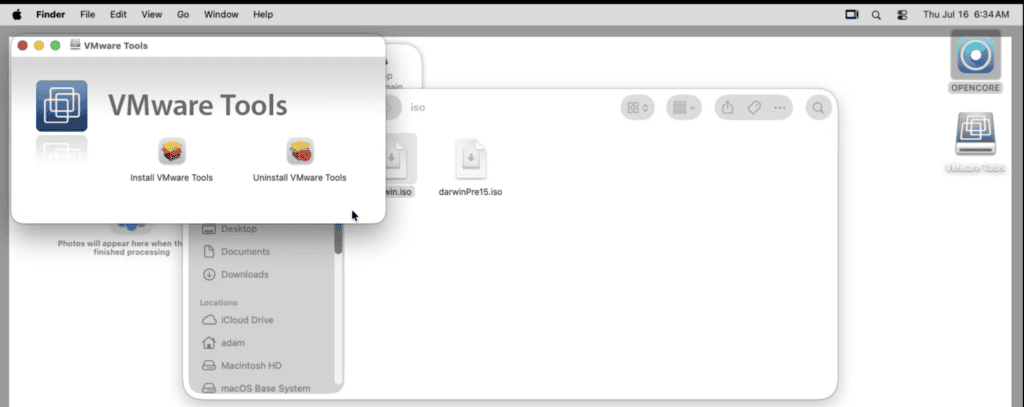
You may be prompted to:
- Enter your password
- Allow the system extension
- Approve VMware in Privacy & Security
Tip: The first installation attempt often fails. Simply run the installer a second time. It usually succeeds on the second attempt.
Restart the virtual machine.
Graphics performance should improve significantly.
See also: How to Use Your Laptop as a Monitor for Any PC
Step 11: Enable Shared Folders
Sharing files between Windows and macOS makes installing additional drivers much easier.
In VMware:
VM Settings
→ Options
→ Shared Folders
Enable:
Always EnabledAdd any folder from your Windows computer.
Restart the virtual machine.
Inside macOS, you’ll find it under:
Go
→ Computer
→ VMware Shared Folders
Step 12: Fix Audio
By default, audio doesn’t work.
The solution requires disabling a conflicting EFI tool before installing the OC4VM audio driver.
Restart the virtual machine.
Open OpenShell.
Run the following commands:
FS8:cd EFI → cd OC → cd ToolsCheck the current configuration:
CsrUtil.efi statusDisable the conflicting configuration:
CsrUtil.efi disable 0xA85Verify the change:
CsrUtil.efi statusRestart the virtual machine:
resetOnce macOS boots again, copy the audio driver from the packages folder inside OC4VM into your shared folder.
Install the driver normally.
Allow the system extension when prompted and restart macOS.
Audio should now work correctly.
Final Thoughts
Running macOS 26 Tahoe inside VMware is easier than ever thanks to OC4VM and VMware Workstation.
Although the installation involves several steps, each one is straightforward when followed carefully. Once VMware Tools and the audio driver are installed, the virtual machine becomes fast enough for testing applications, exploring new macOS features, or learning the operating system without needing Apple hardware.
If you’re an IT professional, developer, or technology enthusiast, this setup provides an excellent way to experiment with macOS while keeping your Windows installation untouched.
When go to vmware I couldn’t find intel or amd ?
In the extracted OC4VM folder !
Is it true to assume that logging in with a AppleID will not work?
You can still use it without an Apple ID. If it works, I signed in with my iCloud account!