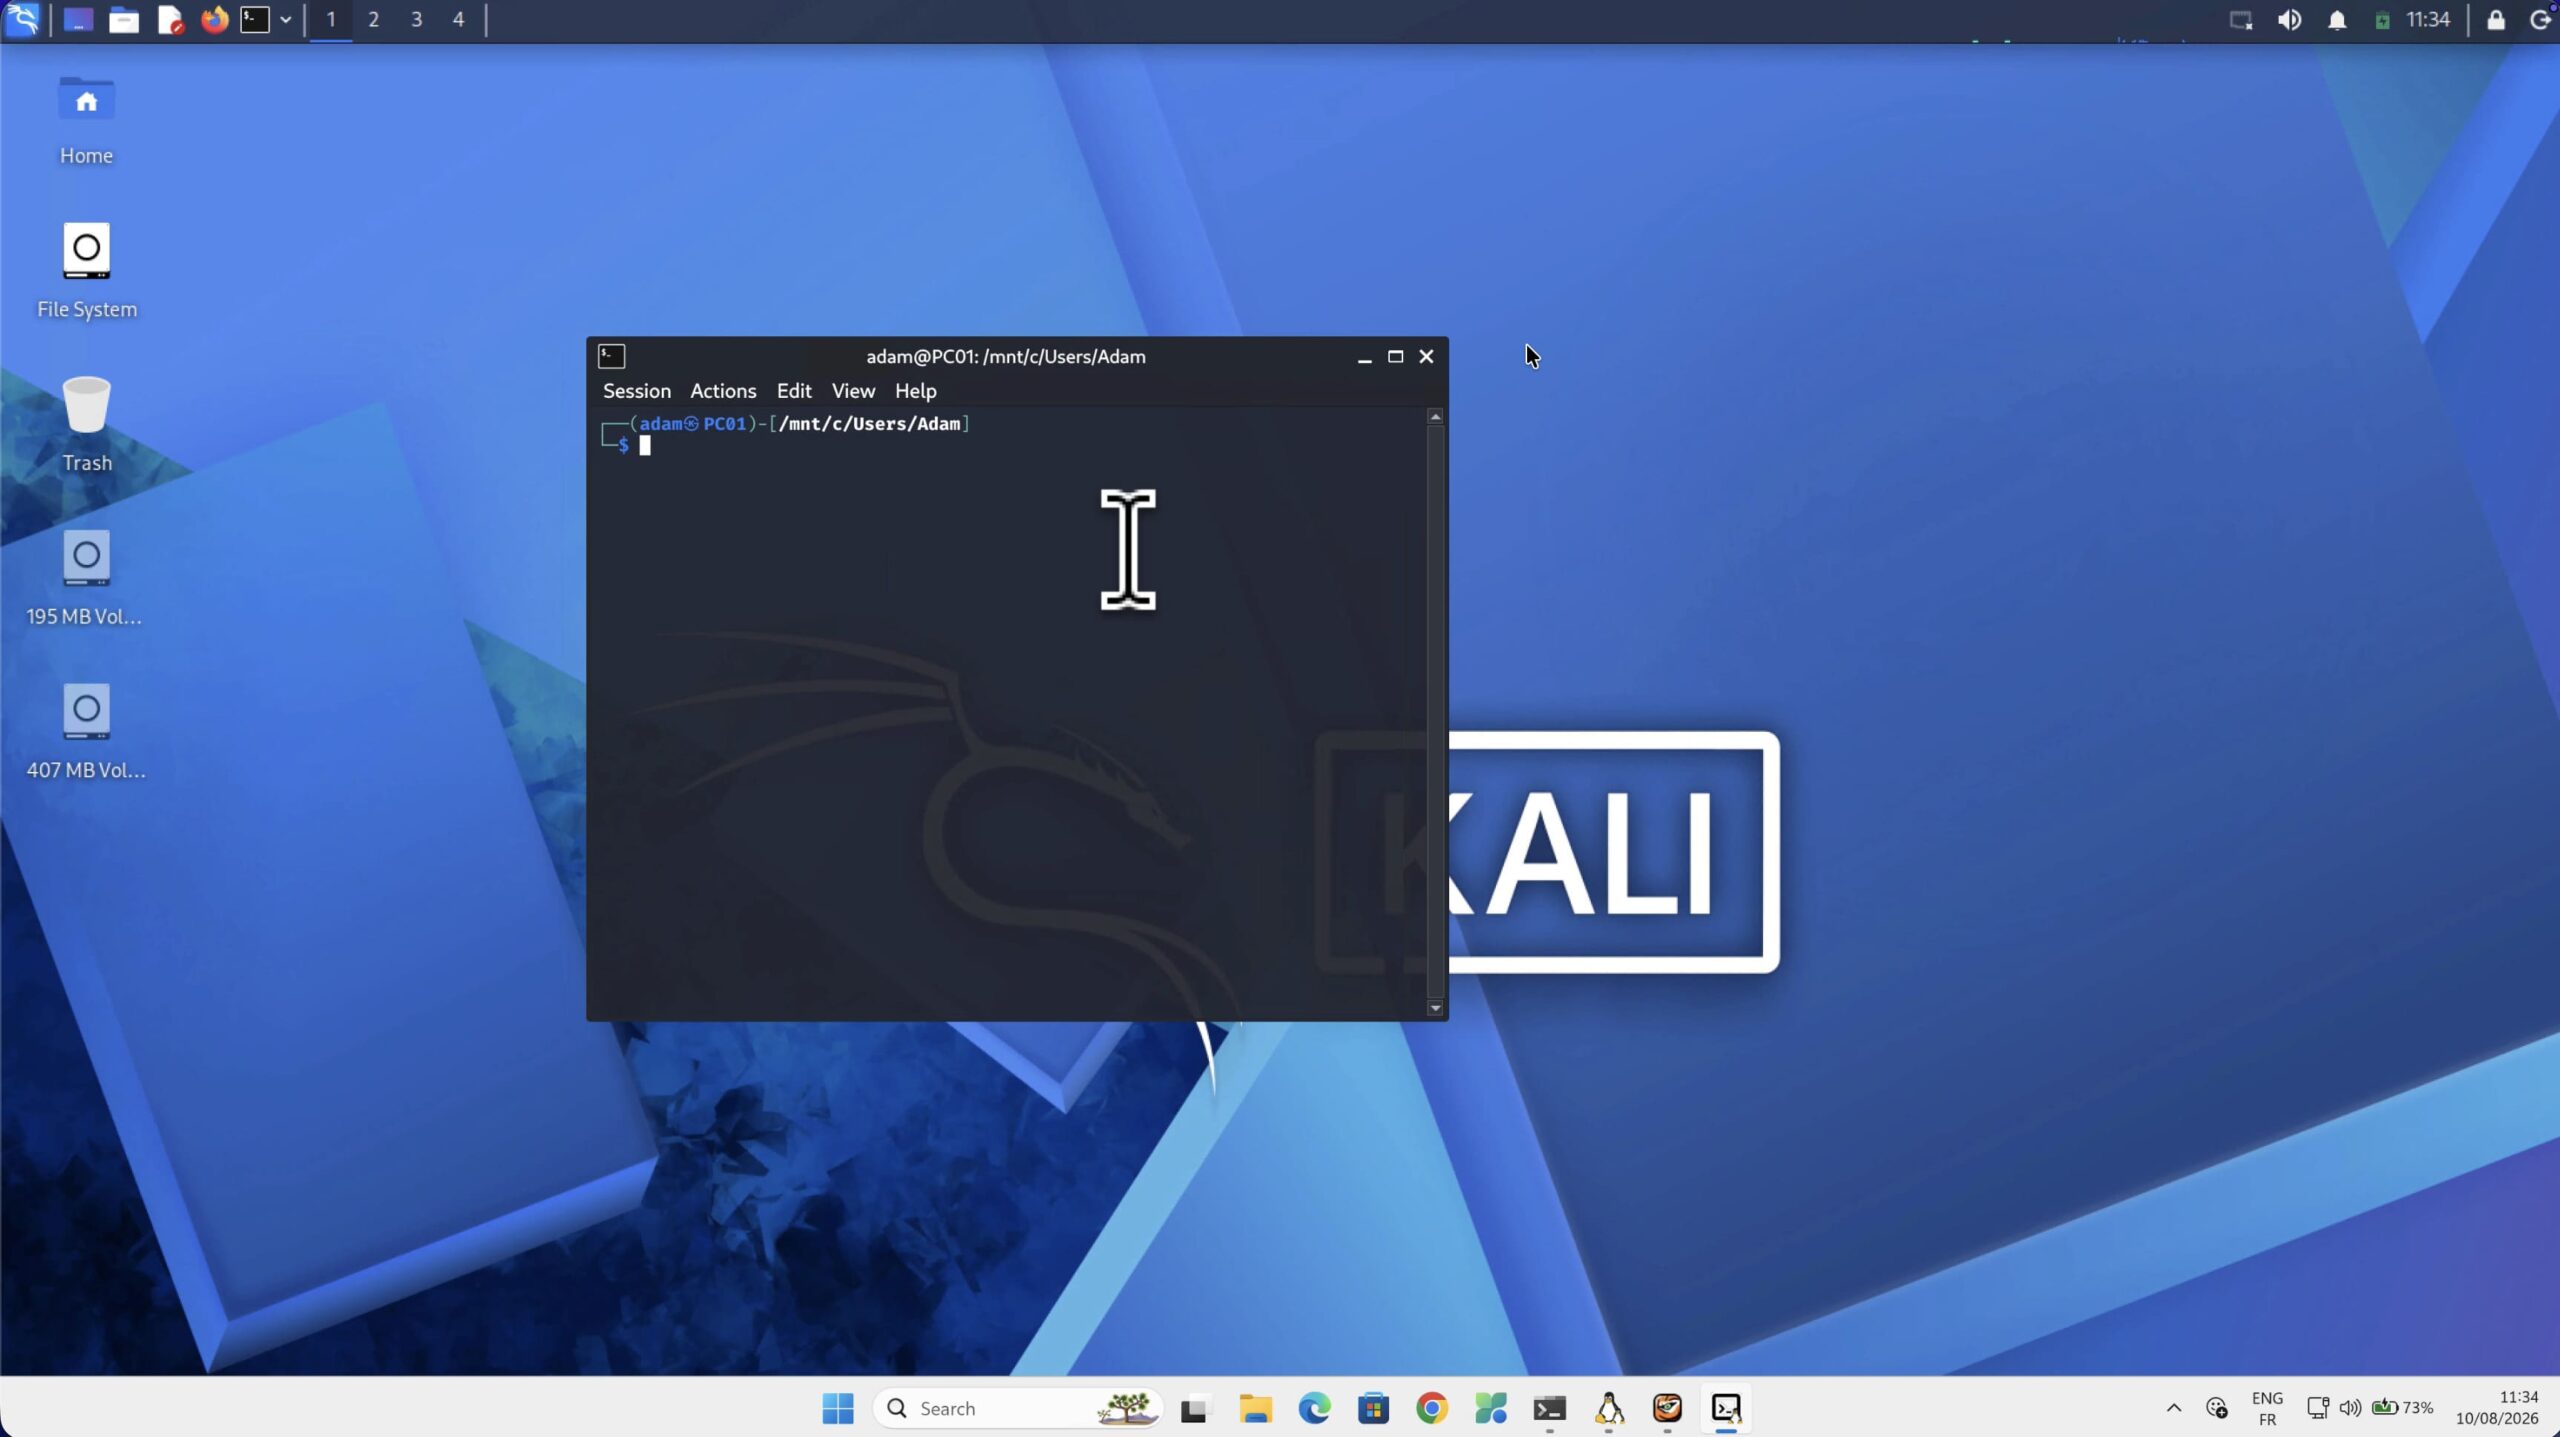
What if you could run a complete Kali Linux desktop directly inside Windows, including the graphical interface and Kali’s security tools, without setting up a traditional virtual machine or dual-booting your computer?
That’s exactly what WSL2 and Win-KeX make possible.
What Is WSL2?
Windows Subsystem for Linux 2 (WSL2) allows Linux distributions to run directly on Windows.
Unlike the original version of WSL, WSL2 uses a real Linux kernel running inside a lightweight managed virtual machine. You don’t need to manually create a virtual machine, configure a virtual disk, or manage a separate operating system installation.
For Kali Linux, this provides several useful advantages.
Full Linux Kernel
Kali runs with an actual Linux kernel, allowing many Linux and security tools to work as expected.
Windows File Integration
Your Windows files are accessible from Kali through: /mnt/c/
You can also access your WSL files from Windows.
No Traditional VM Management
There’s no need to manually configure:
- Virtual machine memory
- Virtual disks
- Virtual network adapters
- VM snapshots
- Boot configurations
Kali starts directly from Windows.
Full Kali Desktop With Win-KeX
A standard Kali WSL installation primarily gives you a command-line environment.
Win-KeX adds the graphical experience by providing Kali’s XFCE desktop inside Windows.
What You Need Before Installing Kali
Before starting, make sure your computer meets these basic requirements.
Windows Version
You need:
- Windows 11, or
- Windows 10 version 2004 or later
You can check your Windows version from:
Settings → System → About
Virtualization
Hardware virtualization must be enabled.
To check:
- Open Task Manager.
- Select Performance.
- Click CPU.
- Look for Virtualization.
It should say:
Enabled
If it says Disabled, you’ll need to enable Intel VT-x or AMD-V in your BIOS/UEFI settings.

Memory
Kali with a graphical desktop requires more resources than a basic command-line installation.
At least 8 GB of system RAM is recommended for a comfortable experience.
Step 1: Install WSL2
Open PowerShell as Administrator.
Run:
wsl --install --no-distributionWindows may ask you to restart your computer.
Restart and then open PowerShell as Administrator again.
Step 2: Check Available Linux Distributions
Once Windows has restarted, run:
wsl --list --onlineYou’ll see a list of Linux distributions available through WSL.
Look for: kali-linux
The exact distribution name is important because you’ll use it in the next command.
Step 3: Install Kali Linux
Install Kali with:
wsl --install -d kali-linuxWSL downloads and installs the Kali Linux distribution.
The download size and installation time can vary depending on the current package and your internet connection.
When the installation finishes, Kali launches and asks you to create a Linux user.
Once you’ve confirmed the password, your Kali Linux user account is ready.
You’ll now have a Kali command prompt running directly inside Windows.
Step 4: Update Kali Linux
Before installing the graphical environment, update Kali’s package lists and installed packages.
Run:
sudo apt update && sudo apt upgrade -yEnter your Kali password when prompted.
Kali downloads the latest package information and installs available updates.
Depending on how long the base installation has been available and your connection speed, this may take several minutes.
Let the process finish completely before continuing.
Step 5: Install Win-KeX
Now it’s time to install the component that gives Kali its full desktop environment.
Run:
sudo apt install -y kali-win-kexWin-KeX installs the components needed to run the Kali XFCE desktop through WSL.
This can download a significant amount of data because it includes the graphical environment and supporting packages.
Installation time depends on your hardware and internet connection.
Once you’re back at the Kali command prompt, Win-KeX is ready.
Step 6: Launch the Kali Desktop
Start the graphical desktop with:
kex --win -sA new window should appear containing the full Kali Linux desktop.
You’ll see:
- XFCE desktop
- Taskbar
- Application menu
- File manager
- Terminal
- Kali applications
- Desktop shortcuts
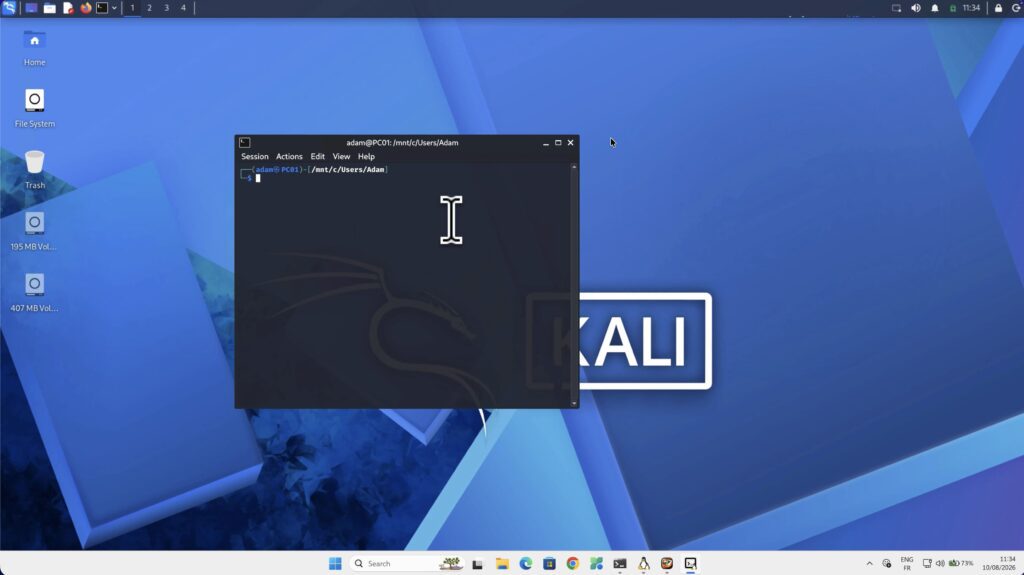
This is a real Kali Linux desktop environment running through WSL2.
See also: How to Switch from Windows to Ubuntu 26.04 LTS
Final Thoughts
With WSL2 and Win-KeX, you can run a full Kali Linux XFCE desktop directly inside Windows without installing a traditional virtual machine or setting up dual boot.
The process is straightforward:
- Install WSL2.
- Install Kali Linux.
- Update Kali.
- Install Win-KeX.
- Launch the desktop.
Once configured, you can switch between Windows and Kali whenever you need to.
For cybersecurity students, CTF players, Linux enthusiasts, and security professionals working in authorized environments, it’s one of the easiest ways to get a Kali Linux desktop running on a Windows machine.