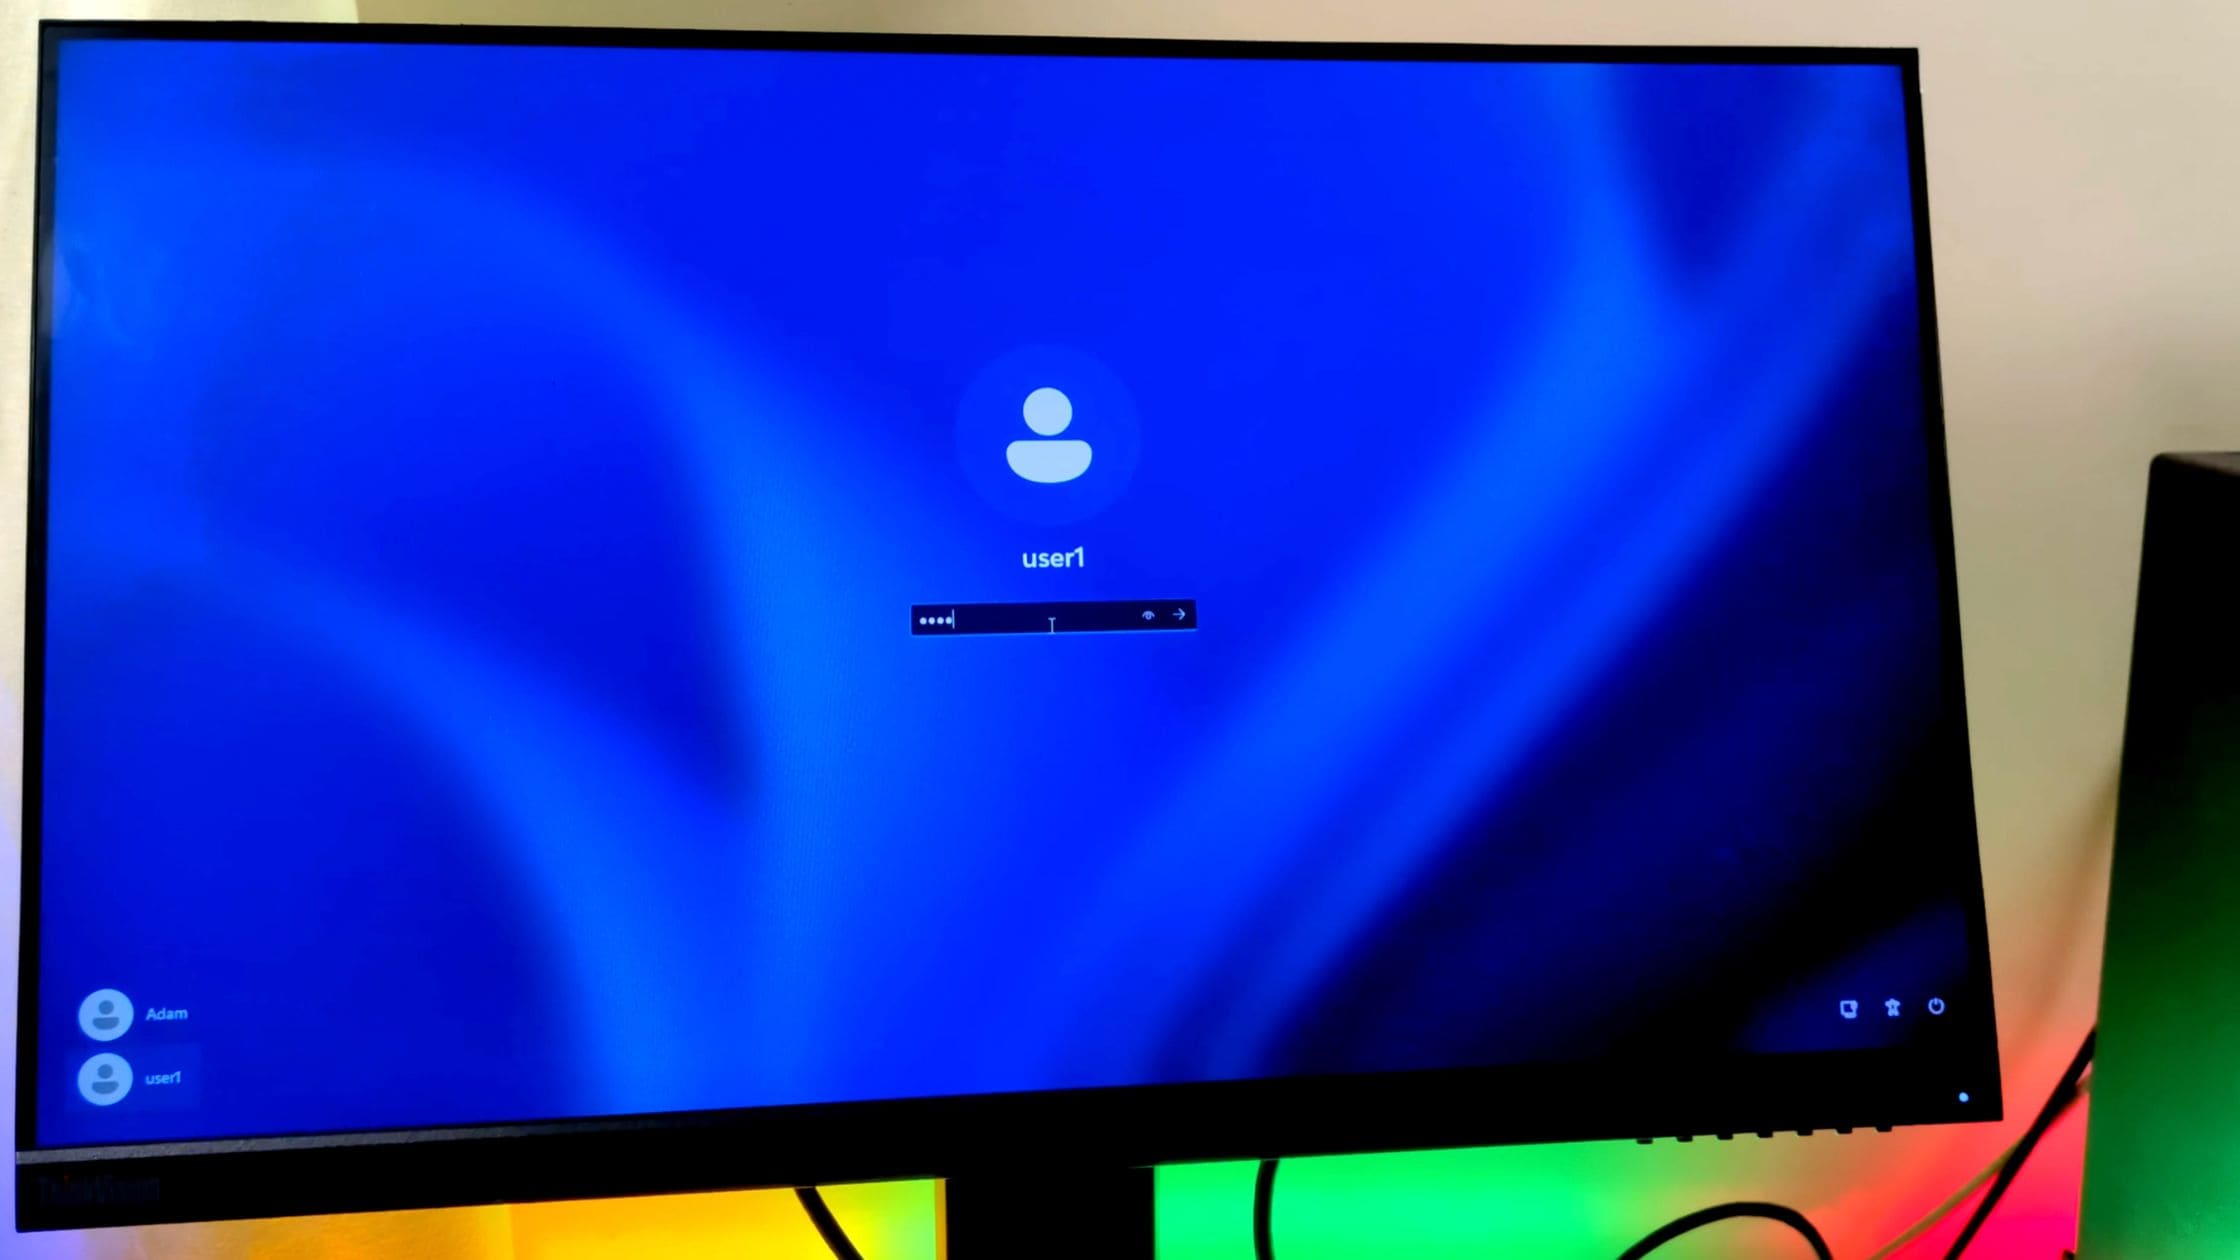
If you share your Windows computer with family members, coworkers, students, or customers, you’ve probably experienced the same problem.
Someone changes a system setting, installs unwanted software, deletes important files, or accidentally modifies a configuration that took hours to set up.
Fortunately, Windows includes powerful built-in tools that let you prevent these changes without installing any third-party software.
By combining Group Policy with standard user accounts, you can create a secure environment where users can work normally but cannot:
- Access the Windows system drive (C:)
- Open the Control Panel or Windows Settings
- Install or uninstall software
- Modify system configurations
- Make administrative changes
This guide walks you through each step to secure a shared Windows 10 or Windows 11 computer.
Note: The Local Group Policy Editor is available on Windows Pro, Enterprise, and Education editions. If you’re using Windows Home, you’ll need alternative methods because Group Policy is not included by default.
Why Use Group Policy to Secure a Shared PC?
Group Policy allows administrators to control how Windows behaves for different users.
Instead of relying on third-party security software, you can use Microsoft’s built-in management tools to restrict access to sensitive parts of the operating system while allowing users to perform everyday tasks.
A properly configured shared PC still allows users to:
- Browse the web
- Use Microsoft Office
- Watch videos
- Print documents
- Run installed applications
But it prevents them from making changes that could compromise the system.
Open the Local Group Policy Editor
To begin:
- Press Windows + R.
- Type: gpedit.msc
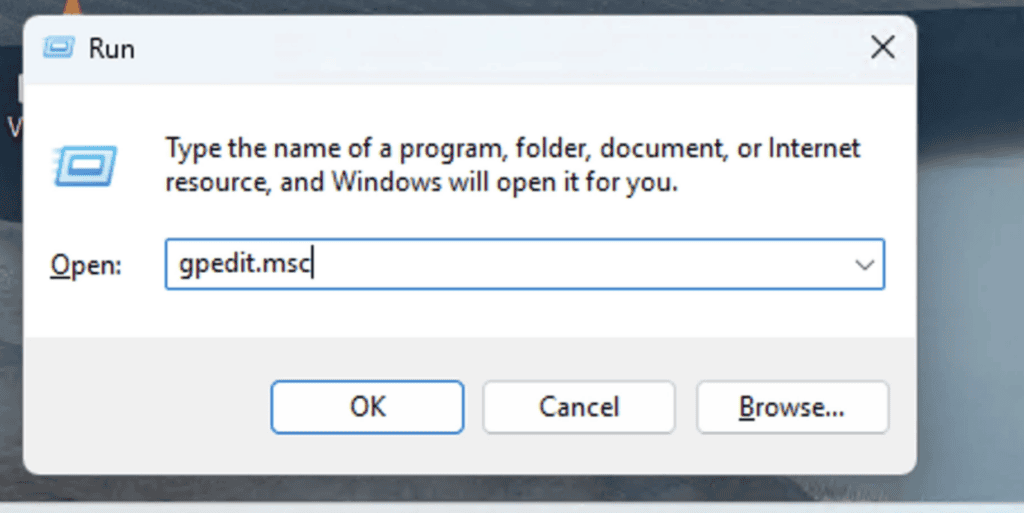
- Press Enter.
- If prompted by User Account Control (UAC), click Yes.
The Local Group Policy Editor opens with two main sections:
- Computer Configuration
- User Configuration
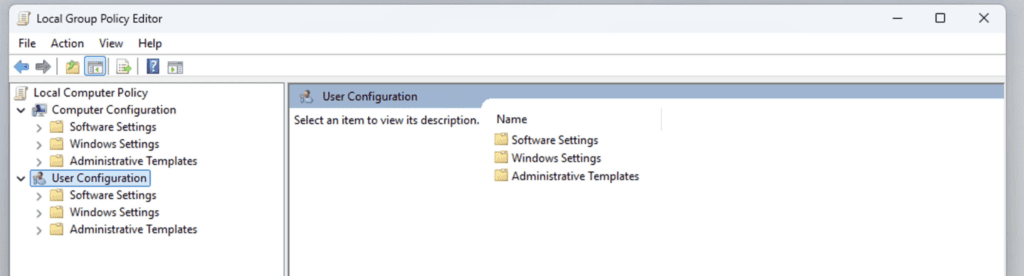
We’ll use policies from both sections throughout this guide.
Restriction 1: Hide the Windows System Drive (C:)
The first restriction hides the Windows system drive from File Explorer.
Although users can still run installed applications normally, they won’t easily browse system folders or accidentally modify Windows files.
Configure the Policy
Navigate to:
User Configuration
└── Administrative Templates
    └── Windows Components
        └── File Explorer
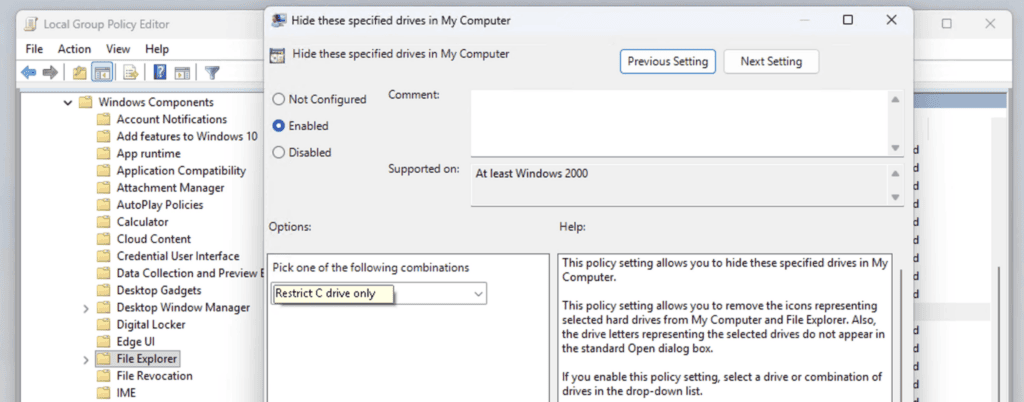
Double-click:
Hide these specified drives in My Computer
Select:
- Enabled
Under Options, choose:
Restrict C drive only
Click:
- Apply
- OK
Apply the Policy Immediately
Open Command Prompt as Administrator and run:
gpupdate /forceThis updates Group Policy without restarting the computer.
Afterward, sign in with a standard user account and open File Explorer.
The C: drive should no longer appear.
Important Limitation
This policy only hides the drive from File Explorer.
If someone knows the exact folder path, they may still attempt to access it through the address bar or other applications.
For stronger protection, combine this policy with a standard user account, as described later in this guide.
Restriction 2: Block Access to Control Panel and Windows Settings
The next step prevents users from changing system settings.
This restriction blocks both:
- Classic Control Panel
- Modern Windows Settings
As a result, users cannot modify:
- Network settings
- Display settings
- Printers
- User accounts
- Installed applications
- Device settings
- Personalization options
Configure the Policy
Navigate to:
User Configuration
└── Administrative Templates
    └── Control Panel
Open:
Prohibit access to Control Panel and PC Settings
Set it to:
Enabled
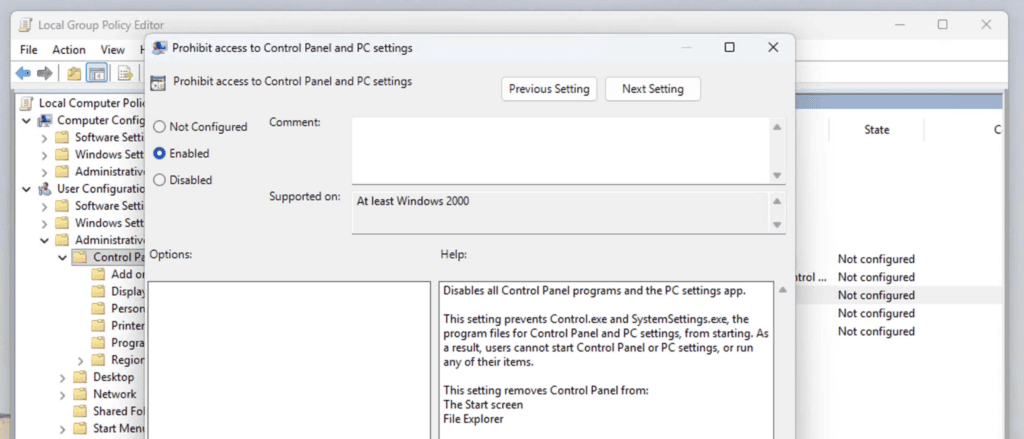
Click:
- Apply
- OK
Again, update Group Policy:
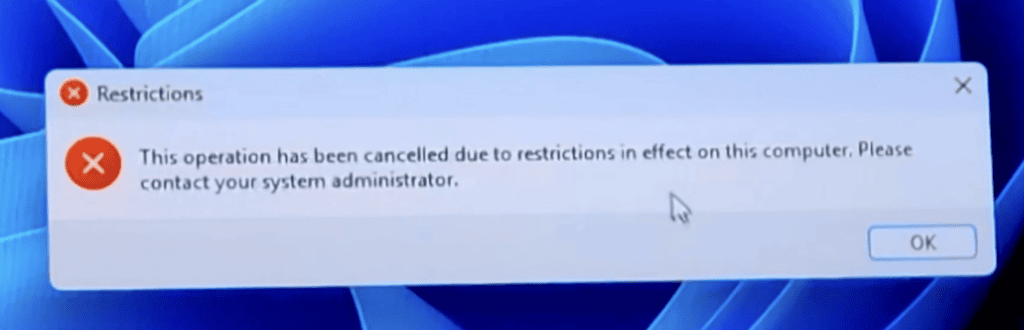
gpupdate /forceNow, if a standard user attempts to open Control Panel or Settings, Windows displays a message indicating that access has been restricted by the administrator.
What Users Can Still Do
This restriction doesn’t interfere with normal computer use.
Users can still:
- Browse the internet
- Open documents
- Watch videos
- Print files
- Use installed software
- Access shared folders
Only administrative configuration tools are blocked.
Restriction 3: Prevent Software Installation
One of the biggest risks on a shared computer is unauthorized software installation.
Windows includes a policy that disables the Windows Installer service, preventing most MSI-based installations.
Configure the Policy
Navigate to:
Computer Configuration
└── Administrative Templates
    └── Windows Components
        └── Windows Installer
Double-click:
Turn off Windows Installer
Select:
Enabled
Under Options, choose:
Always
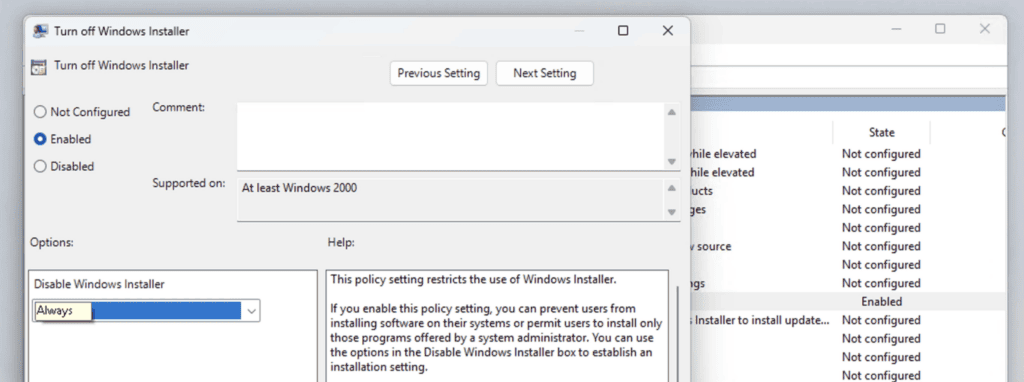
Click:
- Apply
- OK
Run:
gpupdate /forceto activate the new policy.
What Happens?
When a standard user tries to install software:
- Windows blocks the installation, or
- Windows prompts for administrator credentials.
Without administrator privileges, installation cannot continue.
Keep in Mind
Some software doesn’t rely on the Windows Installer service.
However, because standard user accounts don’t have administrative privileges, most applications still cannot install successfully.
Using both Group Policy and standard user accounts provides much stronger protection than either method alone.
Secure the Administrator Account
Your security policies are only effective if users cannot access the administrator account.
If someone knows the administrator password, they can simply remove every restriction you’ve configured.
Verify the Administrator Password
Open:
Computer Management
Navigate to:
Local Users and Groups
└── Users
Locate your administrator account and ensure it uses a strong, unique password.
A strong password should include:
- Uppercase letters
- Lowercase letters
- Numbers
- Special characters
- At least 12 characters
Never share this password with restricted users.
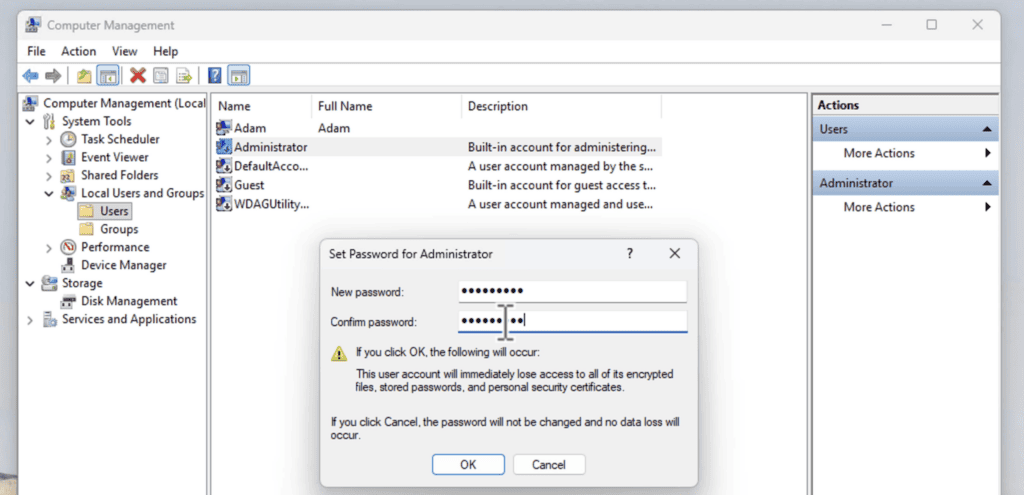
If someone occasionally needs administrator access—for example, to install approved software—you should enter the password yourself instead of revealing it.
Create a Standard User Account
Instead of allowing everyone to use the administrator account, create a dedicated standard account for daily use.
Go to:
Settings → Accounts → Family & other users
Under Other users, click:
Add account
Create a new user.
Examples:
- Guest
- Shared
- Student
- Office
- User1
After creating the account, ensure its account type is:
Standard User
Do not make it an administrator.
All Group Policy restrictions will automatically apply when this account signs in.
Test the Restrictions
After configuring everything, it’s important to verify that the policies work correctly.
Lock the computer by pressing: Windows + L
Sign in using the standard user account.
Now test each restriction.
See also: How to Create a Portable Windows 11 Drive with Rufus
Check That the C: Drive Is Hidden
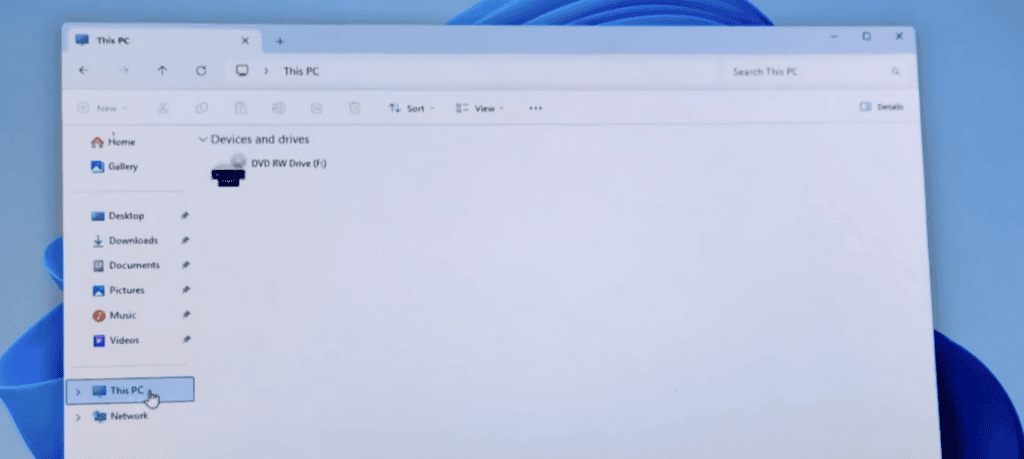
Open File Explorer.
The Windows system drive should no longer be visible, while other drives remain accessible.
Verify That Settings Are Blocked
Search for:
- Control Panel
- Settings
Attempt to open either application.
Windows should display an access restriction message.
Try Installing Software
Download a software installer.
Attempt to launch it.
Depending on the application, Windows should either:
- Block the installation immediately, or
- Request administrator credentials.
Confirm Normal Everyday Use
Despite the restrictions, users should still be able to:
- Browse the internet
- Watch videos
- Use Microsoft Office
- Access email
- Print documents
- Use existing software
- Save personal files
The computer remains fully functional for everyday tasks while preventing administrative changes.
Best Practices for Shared Windows PCs
For maximum security, consider these additional recommendations:
- Always use separate accounts for each user.
- Reserve the administrator account for maintenance only.
- Keep Windows and installed software updated.
- Enable BitLocker on supported devices to protect data if the computer is lost or stolen.
- Regularly back up important files.
- Review Group Policy settings periodically to ensure they still meet your security needs.
Frequently Asked Questions
Does this work on Windows 11 Home?
No.
The Local Group Policy Editor isn’t included in Windows Home editions. These instructions apply to Windows Pro, Enterprise, and Education.
Can users still access the internet?
Yes.
These restrictions don’t affect web browsing, email, or most everyday applications.
Can users install portable applications?
Some portable applications may still run because they don’t require installation. However, they won’t have administrative privileges, and many enterprise environments restrict running unknown executables through additional security policies such as AppLocker or Windows Defender Application Control.
Can I hide other drives besides C:?
Yes.
The Hide these specified drives policy allows you to hide multiple drive letters if needed.
Can I remove these restrictions later?
Yes.
Simply return to the corresponding Group Policy settings and change them to Not Configured or Disabled, then run:
gpupdate /forceto apply the changes.
Final Thoughts
If multiple people use the same Windows computer, protecting it from accidental or unauthorized changes is essential.
With just a few built-in Windows tools, you can create a secure shared environment where users can browse the web, work on documents, and use installed applications without being able to modify critical system settings.
By combining Group Policy, a strong administrator password, and standard user accounts, you significantly reduce the risk of unwanted software installations, configuration changes, and accidental damage—all without relying on third-party security software.