Reinstalling Windows can make your PC feel brand new. It’s one of the best ways to fix performance issues, remove unwanted software, and start fresh.
But there’s one problem many people forget about until it’s too late: drivers.
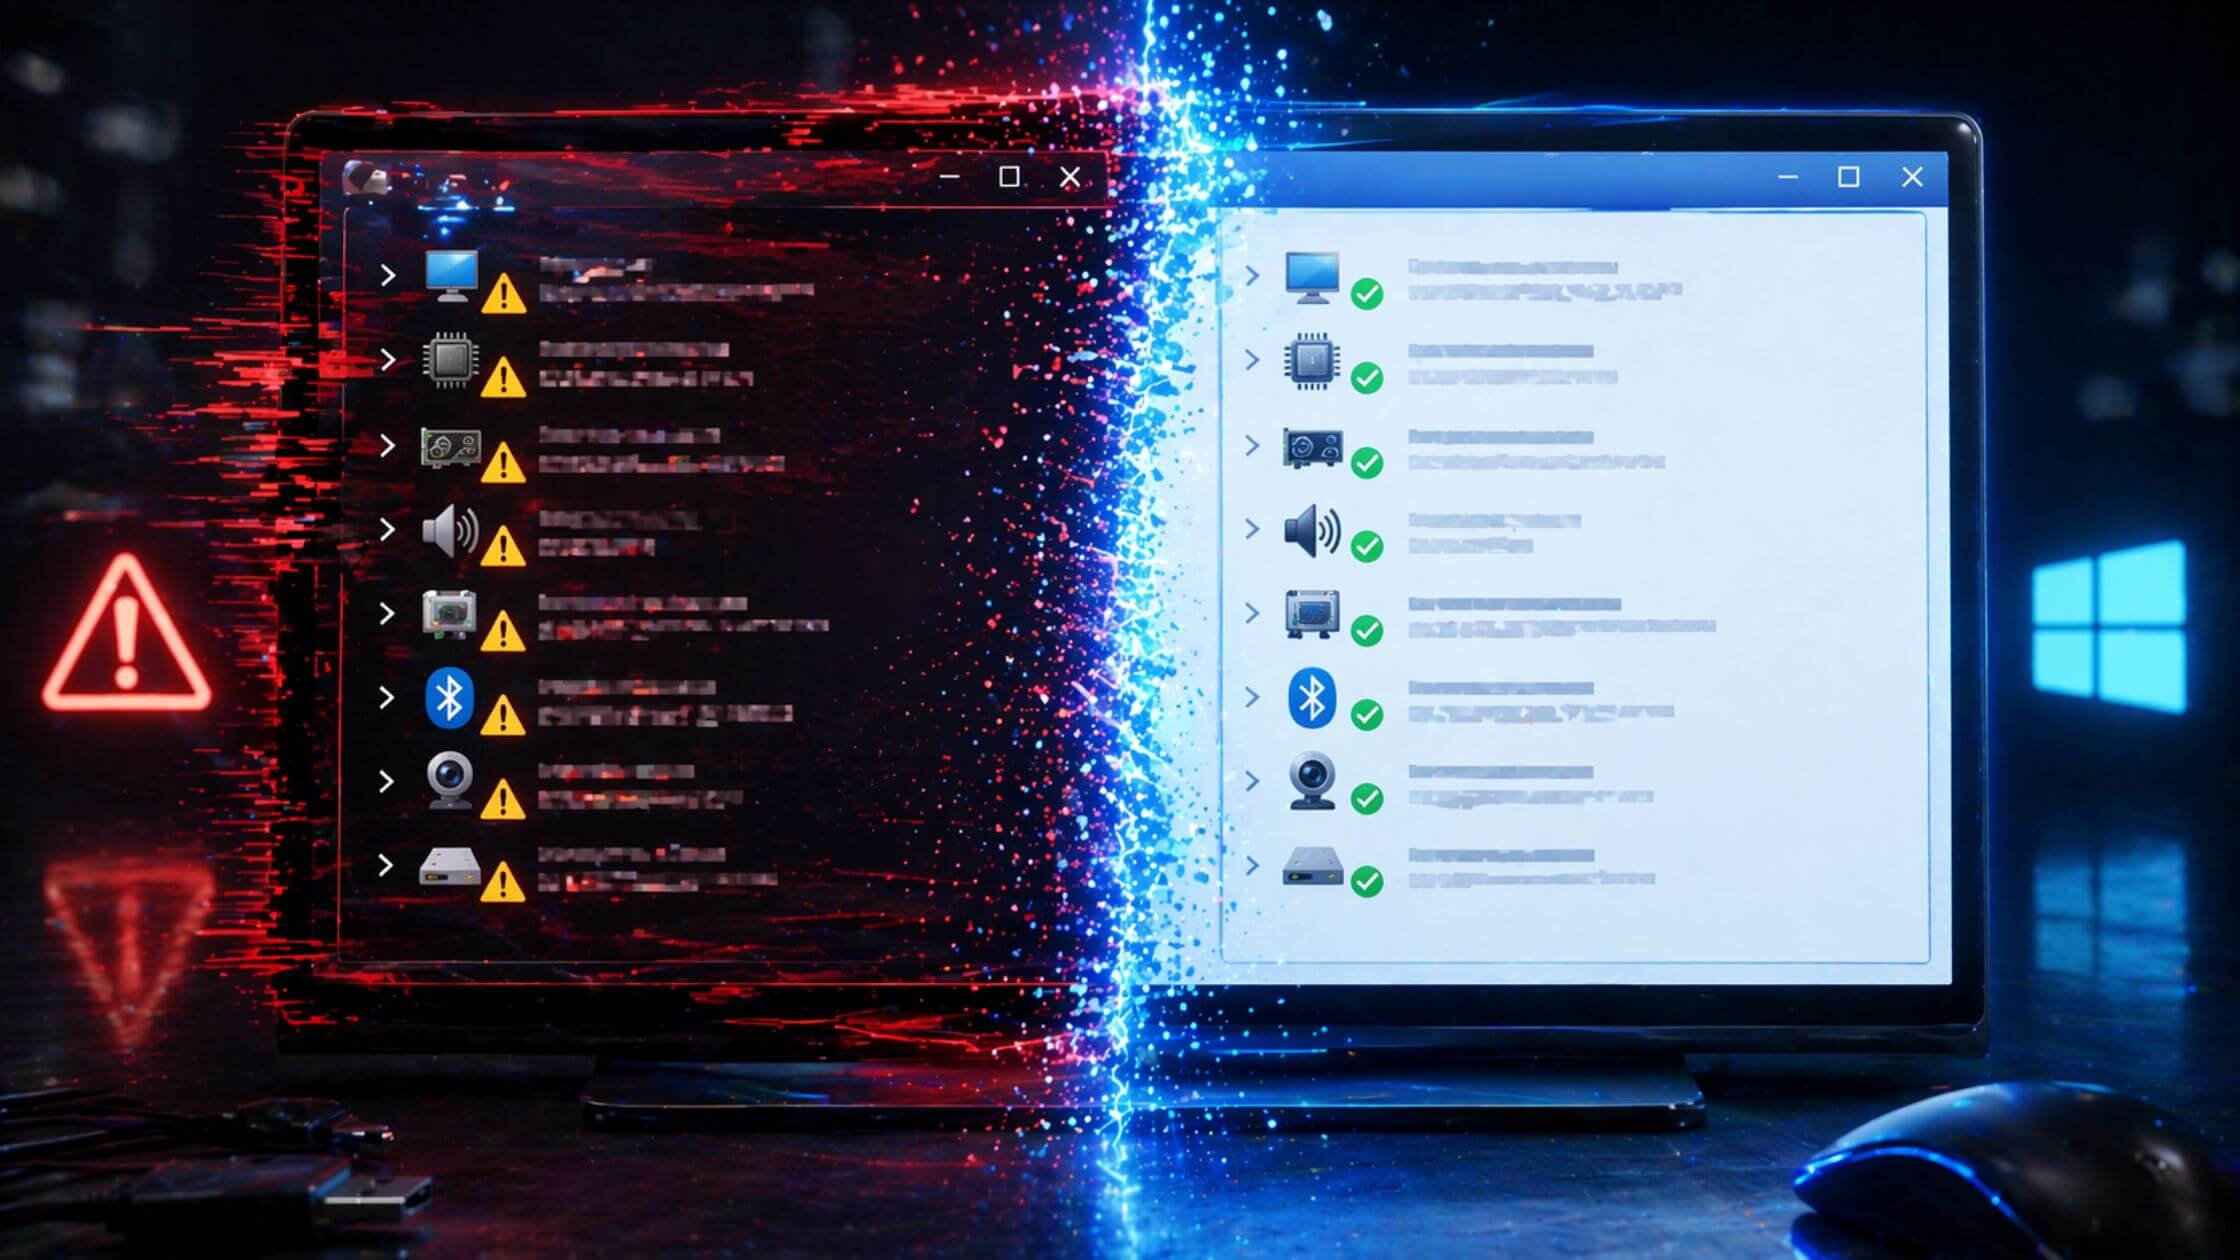
After a clean Windows installation, you may discover that your Wi-Fi isn’t working, your audio is missing, your display resolution looks wrong, or several devices show warning icons in Device Manager.
The good news? Windows includes a built-in tool that lets you back up every installed driver before you reinstall Windows. After the reinstall, you can restore them without downloading anything from the internet.
In this guide, you’ll learn how to back up and restore all your drivers using a simple Windows command.
Why You Should Back Up Your Drivers
When you install Windows from an official Microsoft ISO, Windows starts with a basic collection of generic drivers.
These generic drivers are enough to get Windows running, but they may not support all the hardware inside your computer.
Common examples include:
- Wi-Fi adapters
- Bluetooth devices
- Audio controllers
- Fingerprint readers
- Graphics drivers
- Thunderbolt controllers
- Specialized laptop hardware
Although Windows Update automatically installs many drivers, it doesn’t always find everything.
Having a backup of your working drivers means you can quickly restore your hardware support after reinstalling Windows without spending hours searching manufacturer websites.
Step 1: Create a Driver Backup Folder
Connect your USB drive or external hard drive to your computer.
Open File Explorer and navigate to the drive.
Create a new folder and give it a simple name such as: Drivers
Next:
- Right-click the folder.
- Select Copy as path.
Windows will copy the full folder path to your clipboard.
For example: E:\Drivers
You’ll need this path for the backup command.
Step 2: Back Up All Installed Drivers
Open Command Prompt as Administrator:
- Click Start.
- Type CMD.
- Right-click Command Prompt.
- Select Run as administrator.
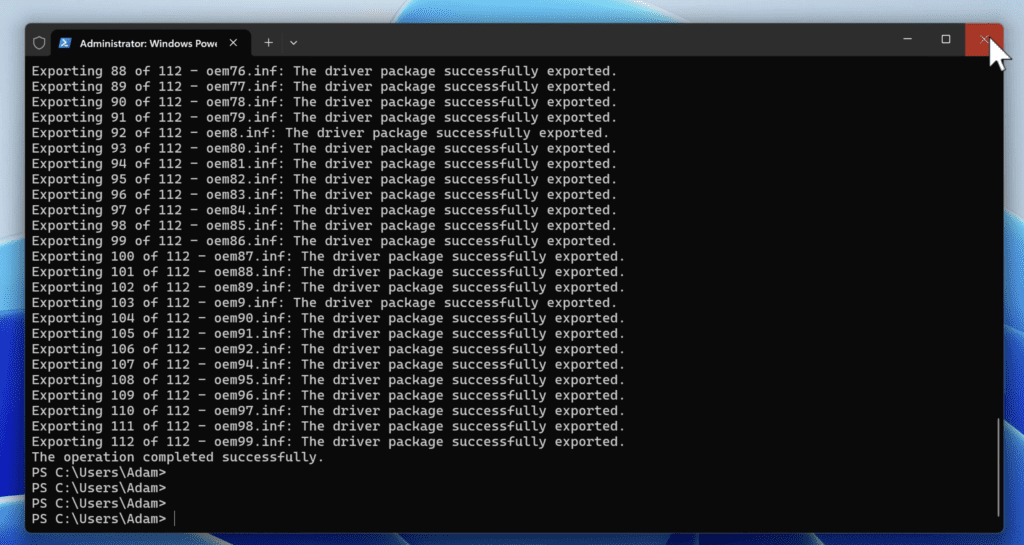
In the Command Prompt window, enter:
DISM /online /export-driver /destination:E:\DriversReplace the path with the location of your own backup folder.
Press Enter.
Windows will immediately begin exporting every installed driver to the specified folder.
The process typically takes between one and five minutes depending on the number of drivers installed.
When finished, you’ll see:
Step 3: Verify the Backup
Open the backup folder on your external drive.
You should see multiple subfolders containing exported driver files.
The exact number depends on your hardware.
Typical systems may contain:
- 20 to 50 driver folders
- Hundreds of driver files
- Several hundred megabytes of data
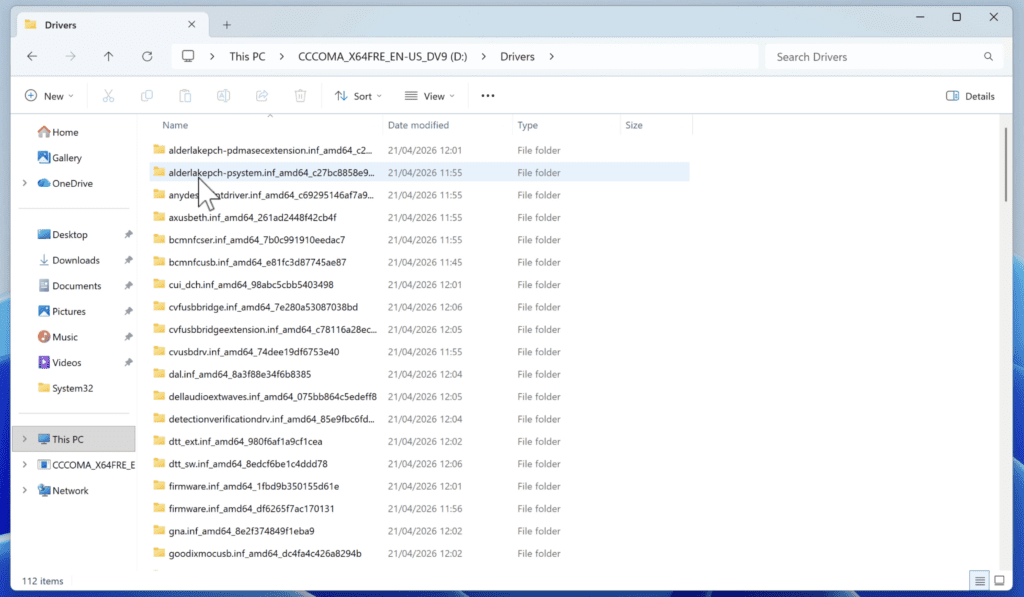
If the folder contains driver files, your backup was successful.
You can now safely reinstall Windows.
Reinstall Windows Normally
At this point, proceed with your Windows installation as you normally would.
Once Windows has been installed and you’re back on the desktop, reconnect the drive containing your driver backup.
How to Restore All Drivers After Reinstalling Windows
There are two methods available.
Method 1: Restore Drivers Through Device Manager
- Right-click the Start button.
- Open Device Manager.
- Click Action.
- Choose Add Drivers (available on supported versions of Windows).
- Browse to your driver backup folder.
- Click Next.
Windows will scan the folder and install all compatible drivers automatically.
After installation finishes, restart your PC.
Method 2: Restore Drivers Using Command Prompt (Recommended)
This method is usually faster.
Open Command Prompt as Administrator and run:
pnputil /add-driver E:\Drivers\*.inf /subdirs /installReplace the path with your own backup folder location.
Press Enter.
Windows will search every subfolder, locate all driver installation files, and install them automatically.
Once complete, restart your computer.
See also: How to Create a Windows 11 Recovery Drive
Verify Everything Installed Correctly
After restarting:
- Open Device Manager.
- Check for yellow warning icons.
- Test your hardware.
Make sure:
- Wi-Fi connects properly
- Bluetooth works
- Audio plays correctly
- Display resolution is correct
- External devices are detected
In most cases, every driver will be restored successfully.
If a device still shows a warning icon, visit the hardware manufacturer’s website and download the latest driver for that specific component.
Final Thoughts
Backing up your drivers before reinstalling Windows can save hours of frustration later.
With a single DISM command, you can preserve every driver currently working on your system and restore them after a clean installation without downloading anything from the internet.
The process takes only a few minutes and can turn what is normally the most annoying part of reinstalling Windows into a simple, automated task.
If you’re planning a Windows reinstall soon, create a driver backup first. Future you will be glad you did.

Pingback: How to Reset a Forgotten Windows 10/11 Password